Fujifilm Dynamic Range: Getting the Most From DR400
Fujifilm’s DR400 setting is one of those features that quietly sits in the menu until you realize how beneficial it can be to your images. And then it can become an essential consideration in any Fujifilm recipe. Now, fortunately, the dynamic range of most Fujifilm cameras I have used has been great, sometimes exceptional. In fact, I think dynamic range in cameras is one of the most evident advancements in digital cameras, and one that can be overlooked given how far we have come.
If you’ve ever come home with JPEGS that contain blown‑out skies and lost detail in shadows, DR400 is the safety net you’ve probably been looking for. Intelligently expanding your camera’s usable dynamic range lets you keep contrasty, high‑sun or backlit scenes under control without resorting to RAW or post‑processing.
I’ve discussed Fuji’s dynamic range before in posts such as “Mastering Fujifilm’s Dynamic Range: When and How to Use It” and “Using Fujifilm Recipes: My Experience and Advice.” In this post, we’ll break down why you should consider using it for your travel photography.
Summary of DR Settings
Dynamic range on Fujifilm cameras controls how much detail you preserve in bright highlights and deep shadows, and learning the basics can noticeably improve your photos. DR100% means no extra processing and behaves like a normal, balanced exposure, while DR200% underexposes by 1 stop to protect highlights, then lifts the shadows for a more even look. DR400 underexposes by two stops, giving you much more highlight protection and richer skies on bright, contrasty days, which makes it especially useful in strong sun but often too flat in overcast, low‑contrast conditions. These settings affect both JPEGs and RAW files (RAW remains more flexible but still reflects the dynamic range choice), and using a higher dynamic range requires a higher ISO, often around 500–800 for DR400.
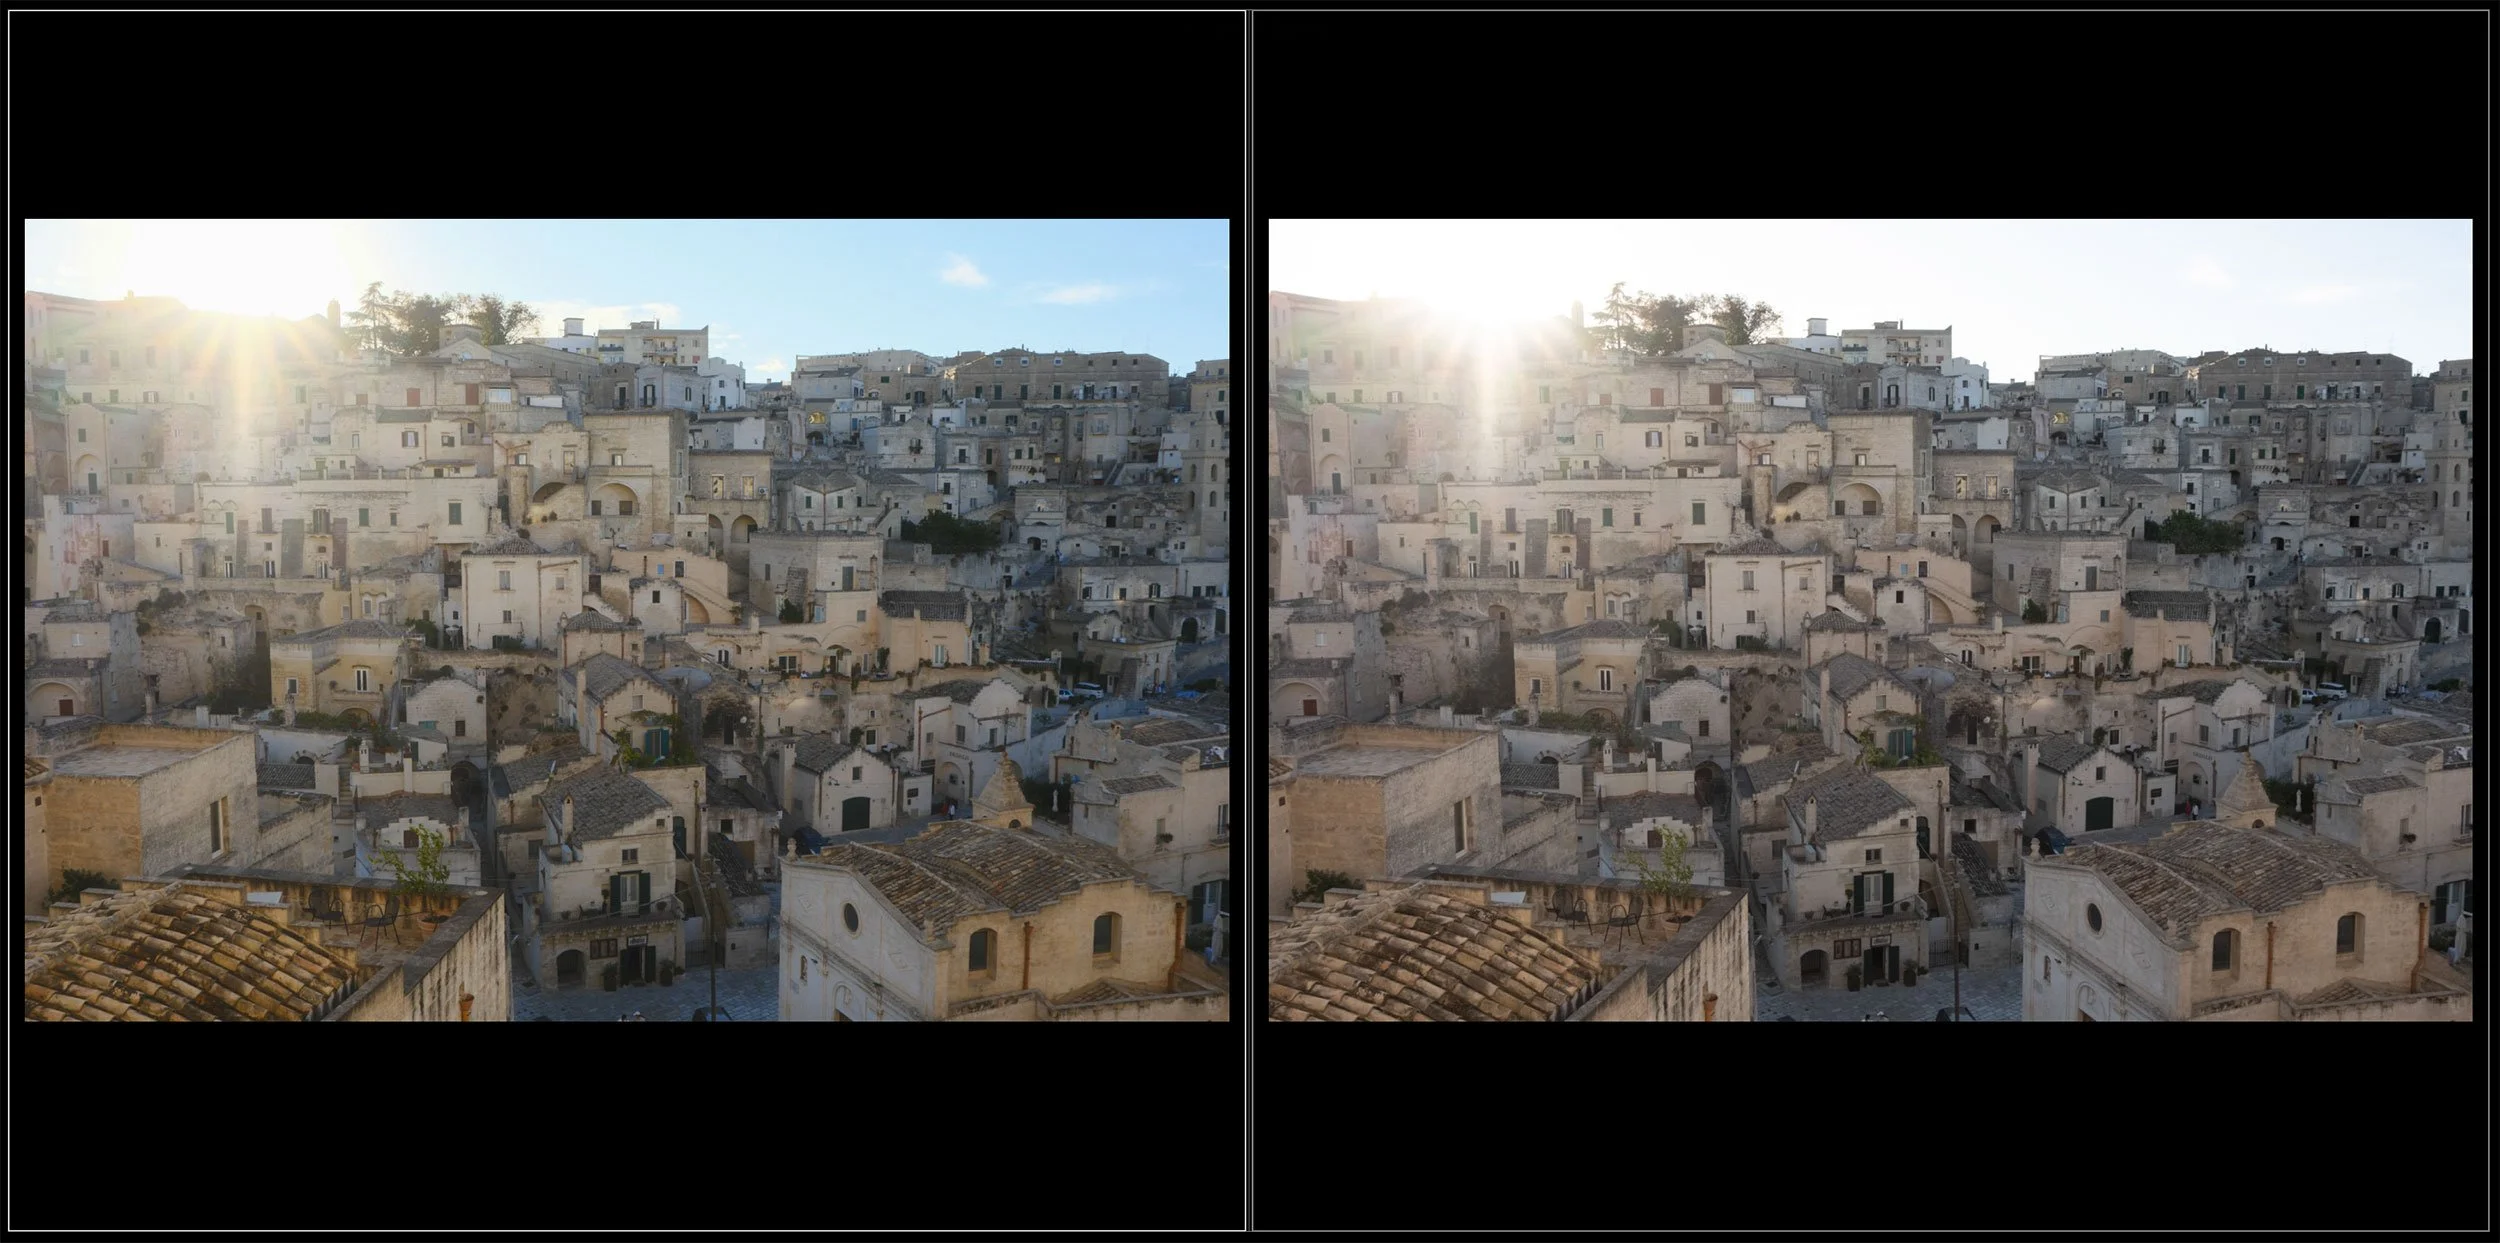
JPEG vs RAW - sky has noticeably more detail in the JPEG
How DR400 Affects Highlights, Shadows, and Exposure
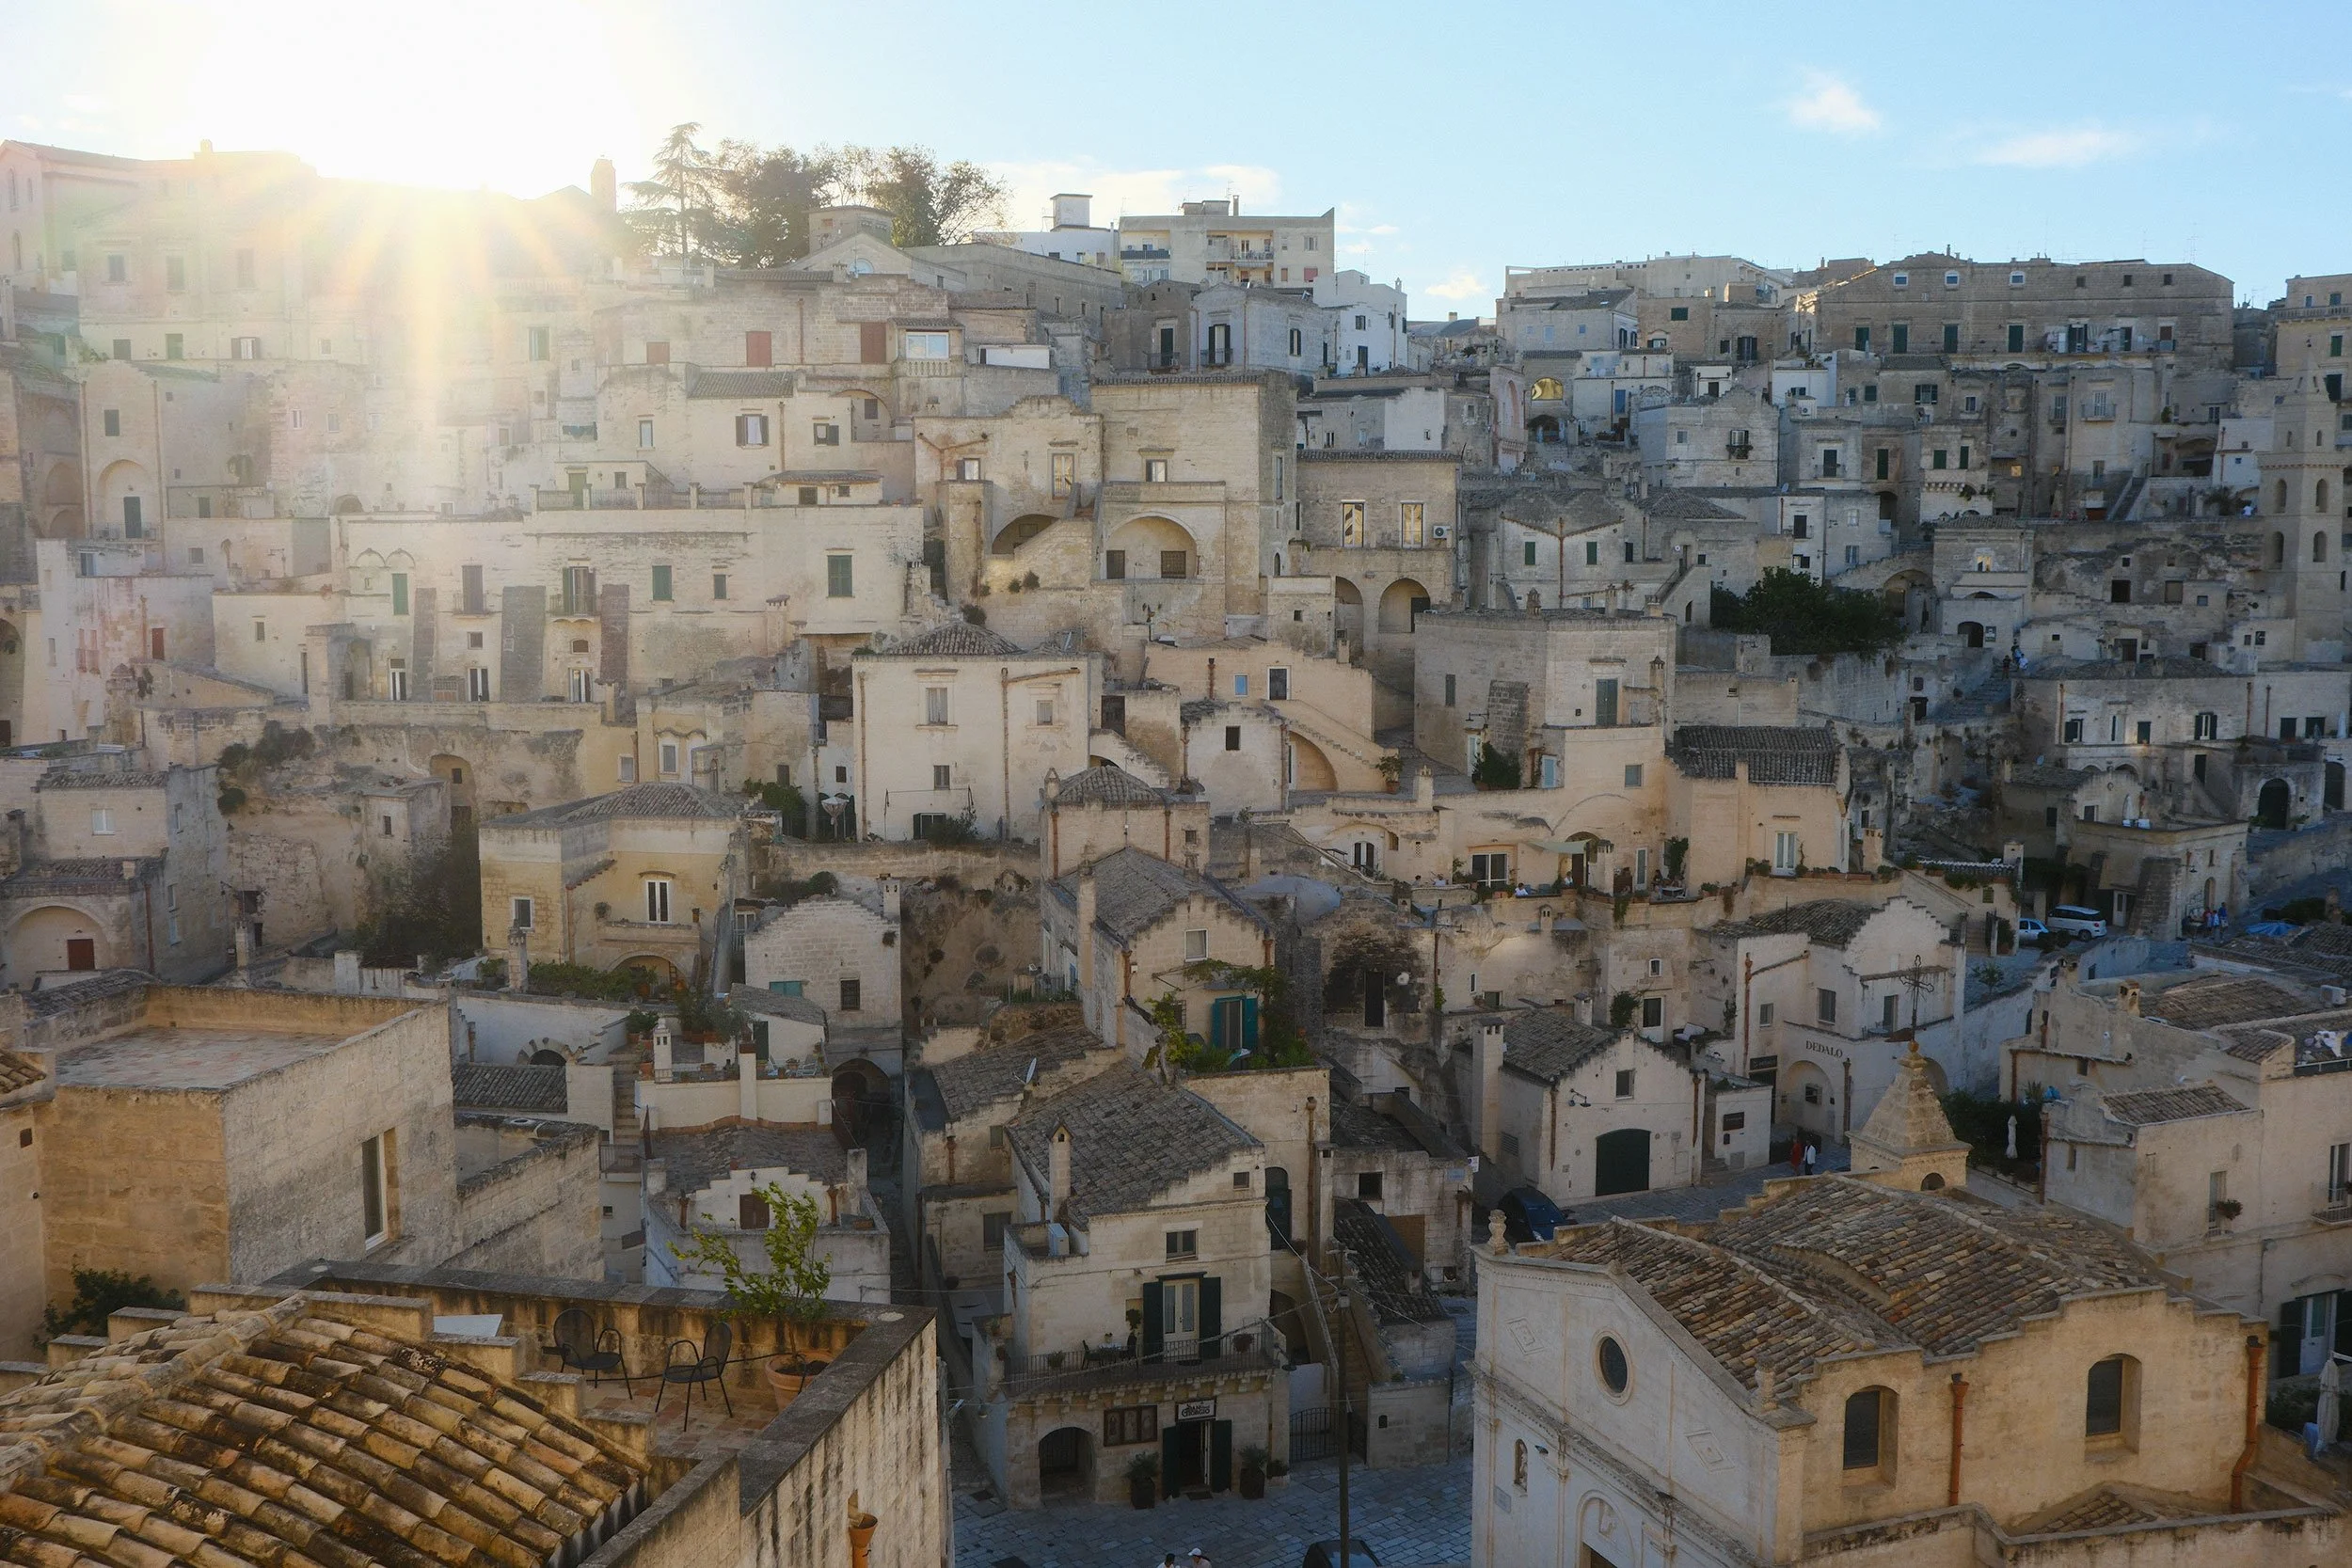
As noted, DR400 underexposes your scene by about 2 stops, giving the most flexibility for shadow detail and highlight protection, which can have a dramatic effect under changing lighting conditions and in the spontaneous nature of travel photography. With two stops of exposure variation, your camera can significantly underexpose the sky while revealing details in the shadows. This can have a dramatic impact on images taken during periods of heavy gradation, such as sunsets and sunrises, when bright light hits the horizon while the foreground is dark. Highlights keep more texture and colour, rather than blowing out. Shadows are simultaneously lifted by the camera’s tone curve, which reveals more detail. As a result, it will reduce overall contrast while maintaining a more balanced image.
Fine‑Tuning DR400 with Highlights and Shadows
In addition to dynamic range adjustment, your menu includes other settings to preserve highlights and shadows. Combining those settings with a dynamic range of DR400 will affect your results. When adjusting those other settings or using a specific Fujifilm recipe, you’re tweaking the impact of what DR400 delivers out of the box. DR400 underexposes to protect highlights and lift darker tones. When you choose DR400 and also keep Highlights at 0, you’ll get softer, better-protected skies and brighter areas. At the same time, Shadows at 0, or negative values, will give you open, detailed, darker regions that feel flatter but forgiving.
On the other hand, if you push Highlights to +1 or +2 with DR400, you’re essentially reducing the effect that DR400 has on your highlights. Conversely, boosting Shadows with a +1 or +2 will technically reveal more. One setting pushes it down, the other brings it back up.
DR400 offers a more balanced approach to controlling highlights and shadows, with separate Highlights and Shadows settings to fine-tune them. There is no right and wrong here, and none are inherently bad for your image. Many recipes use a DR400 setting along with adjustments to highlights and shadows, including mine.
Please consider tuning the DR400, along with your Highlight and Shadow settings, as they affect the tone of your image. Highlights and Shadows are essentially in-camera tone curves, and small adjustments can make a big difference in your images’ contrast. When adjusting these settings, you should first ask yourself what you hope to achieve. What look are you going for? How do you want to portray the scene in front of you? How did you feel in the moment?
Personally, I lean towards warm and soft in many of my travels. I travel to many warm, sunny places, and I want that reflected in my images, as it’s what I experienced.

DR400% JPEG vs RAW
When You May Want to Use DR400
You can use DR400 at any time. If you want to keep the recipe results as is, leave them as is. As I mentioned, I use the DR400 quite regularly in my travel photography because I enjoy the results. I find that the best conditions for using it are bright, sunny days with plenty of sky and sunshine. Throughout the day, and even in midday sun, it significantly helps preserve and enhance skies.
Exploring a vibrant, colourful location also helps; if you use a DR400 with a great recipe, the colours of your surroundings, along with deeper, bluer skies, can look really great.
When You Want to Avoid DR400
On the other hand, DR400 doesn’t work all the time, and on overcast or rainy days, it can look terrible. The loss of contrast is really noticeable when there are no shadows or natural contrasts in your frame. It severely washes things out, leaving no redeeming qualities. In cases like this, stick with DR100 to add some contrast to those images.
The Potential for Added Noise
An important note on Fujifilm's DR400 dynamic range mode: it requires your camera to automatically bump up the ISO to compensate for exposure variations across highlights and shadows. It achieves this by underexposing the base image and then brightening it in post-processing, thereby necessitating higher ISO sensitivity.
If ultra-clean, noise-free photos are your top priority, DR400 might not be ideal. The ISO increase can introduce visible noise, especially in shadows.
That said, the ISO bump is often minimal in practice and won't render your photos unusable. Most modern Fuji cameras that support DR400 excel at higher ISOs.
Personally, I don’t sweat noise much. Still, keep it in mind if noise in your image is something you would rather avoid.
Conclusion
DR400 is a powerful feature worth considering. Think of it as an easy way to balance your photo without loss of detail. With DR400 being the maximum setting, some may not enjoy the results and may choose to back it off a bit with DR200. However, once you understand how it can benefit travel shooting, you may find it your preferred way to shoot JPEGs.
I find this setting a great way to shoot without worrying about blown skies or lost details. I use it frequently, but there are situations where I don’t. If I want a strong contrast and to hide details in the shadows intentionally, or when the weather is dull, I’ll drop it to DR100.