The Power of Concealment in Travel Edits
Travel is amazing. It’s a chance to step into places you’ve never been and see things you may never see again. Each trip is a brief window to explore and pay attention in a way that’s hard to do at home. Even if you spend a month in one city, that’s still a tiny slice of your life, which is exactly what makes it feel so special and fragile. You only get so many mornings in that light, on those streets, with those people, and with that particular version of yourself. How you spend that sliver of time, what you notice, where you wander, and how far you’re willing to push your comfort zone shape your photos and your memories of a place long after you’ve flown home.
Travel photography can be surprisingly challenging. You’re working with whatever you get: the wrong kind of light for your usual style, rain on the day you planned to shoot, crowds where you imagined empty streets. The images you bring back often look very different from what you pictured before the trip. So the real question becomes: how do you make your photos feel stronger and more intentional, without leaning on heavy post‑processing or cloning out every distracting person and object you’d rather not have in the frame?
Create Mystery
Post‑processing gives you a quiet but powerful way to guide the viewer’s eye without erasing or heavily manipulating the scene. Instead of removing distractions completely, you can let them sink into shadow, pushing them into the background while lifting the parts of the image you actually care about. Dodging and burning, targeted contrast work, and perspective adjustments can remove distractions and clutter. At the same time, a gentle lift on key shapes, textures, or light sources draws attention exactly where you want it. The result feels more honest than a “photoshopped‑clean” look: the scene still feels real, but the story becomes clearer, calmer, and more intentional.
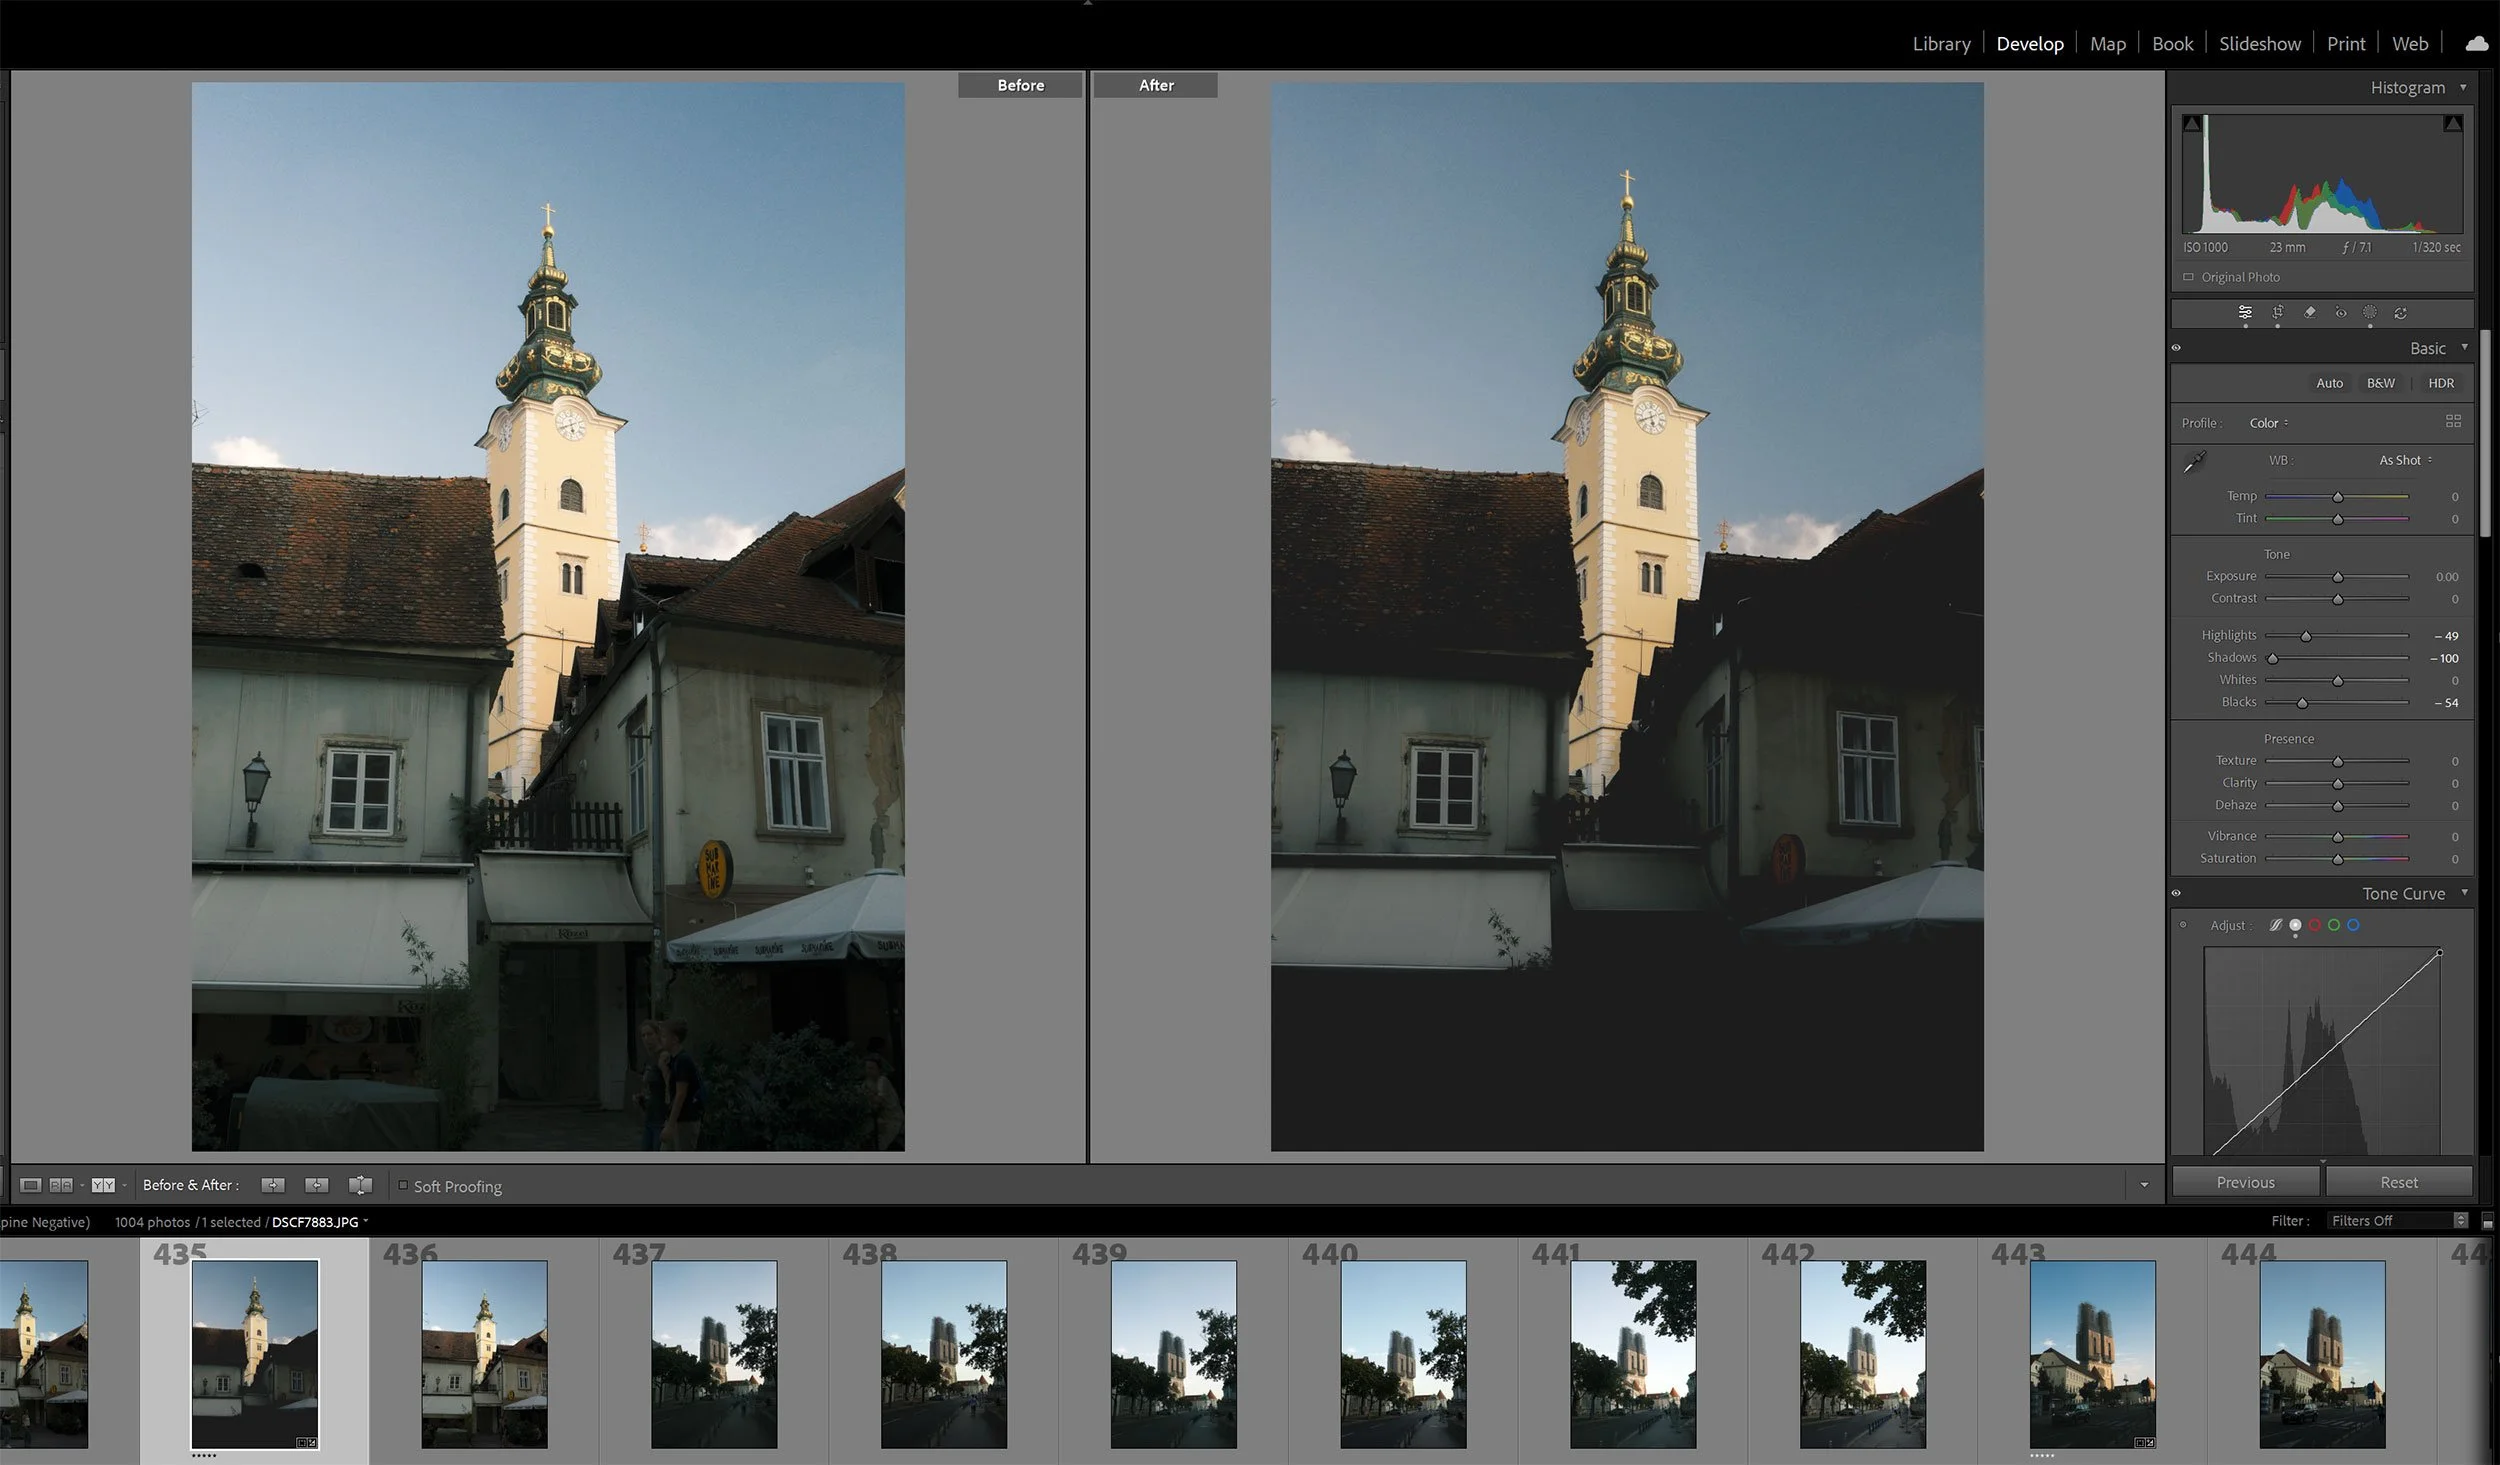
I took a similar approach with both of these photos, with some key adjustments. It’s important to note that these images were applied to a JPEG using a film simulation. The first image to the left is the RAW, and the second is the finalized JPEG.
Here is a summary of the editing steps:
Reduced Shadows -100
Reduced Blacks -54
Reduced Highlights -49
Tone Curve: Lifted the black point: Input 0, Output 21, Reduced the white point: Input 255, Output 249
Transform: Vertical -19
Add Mask (select subject): Exposure 0.51, Highlights -5, Saturation 5
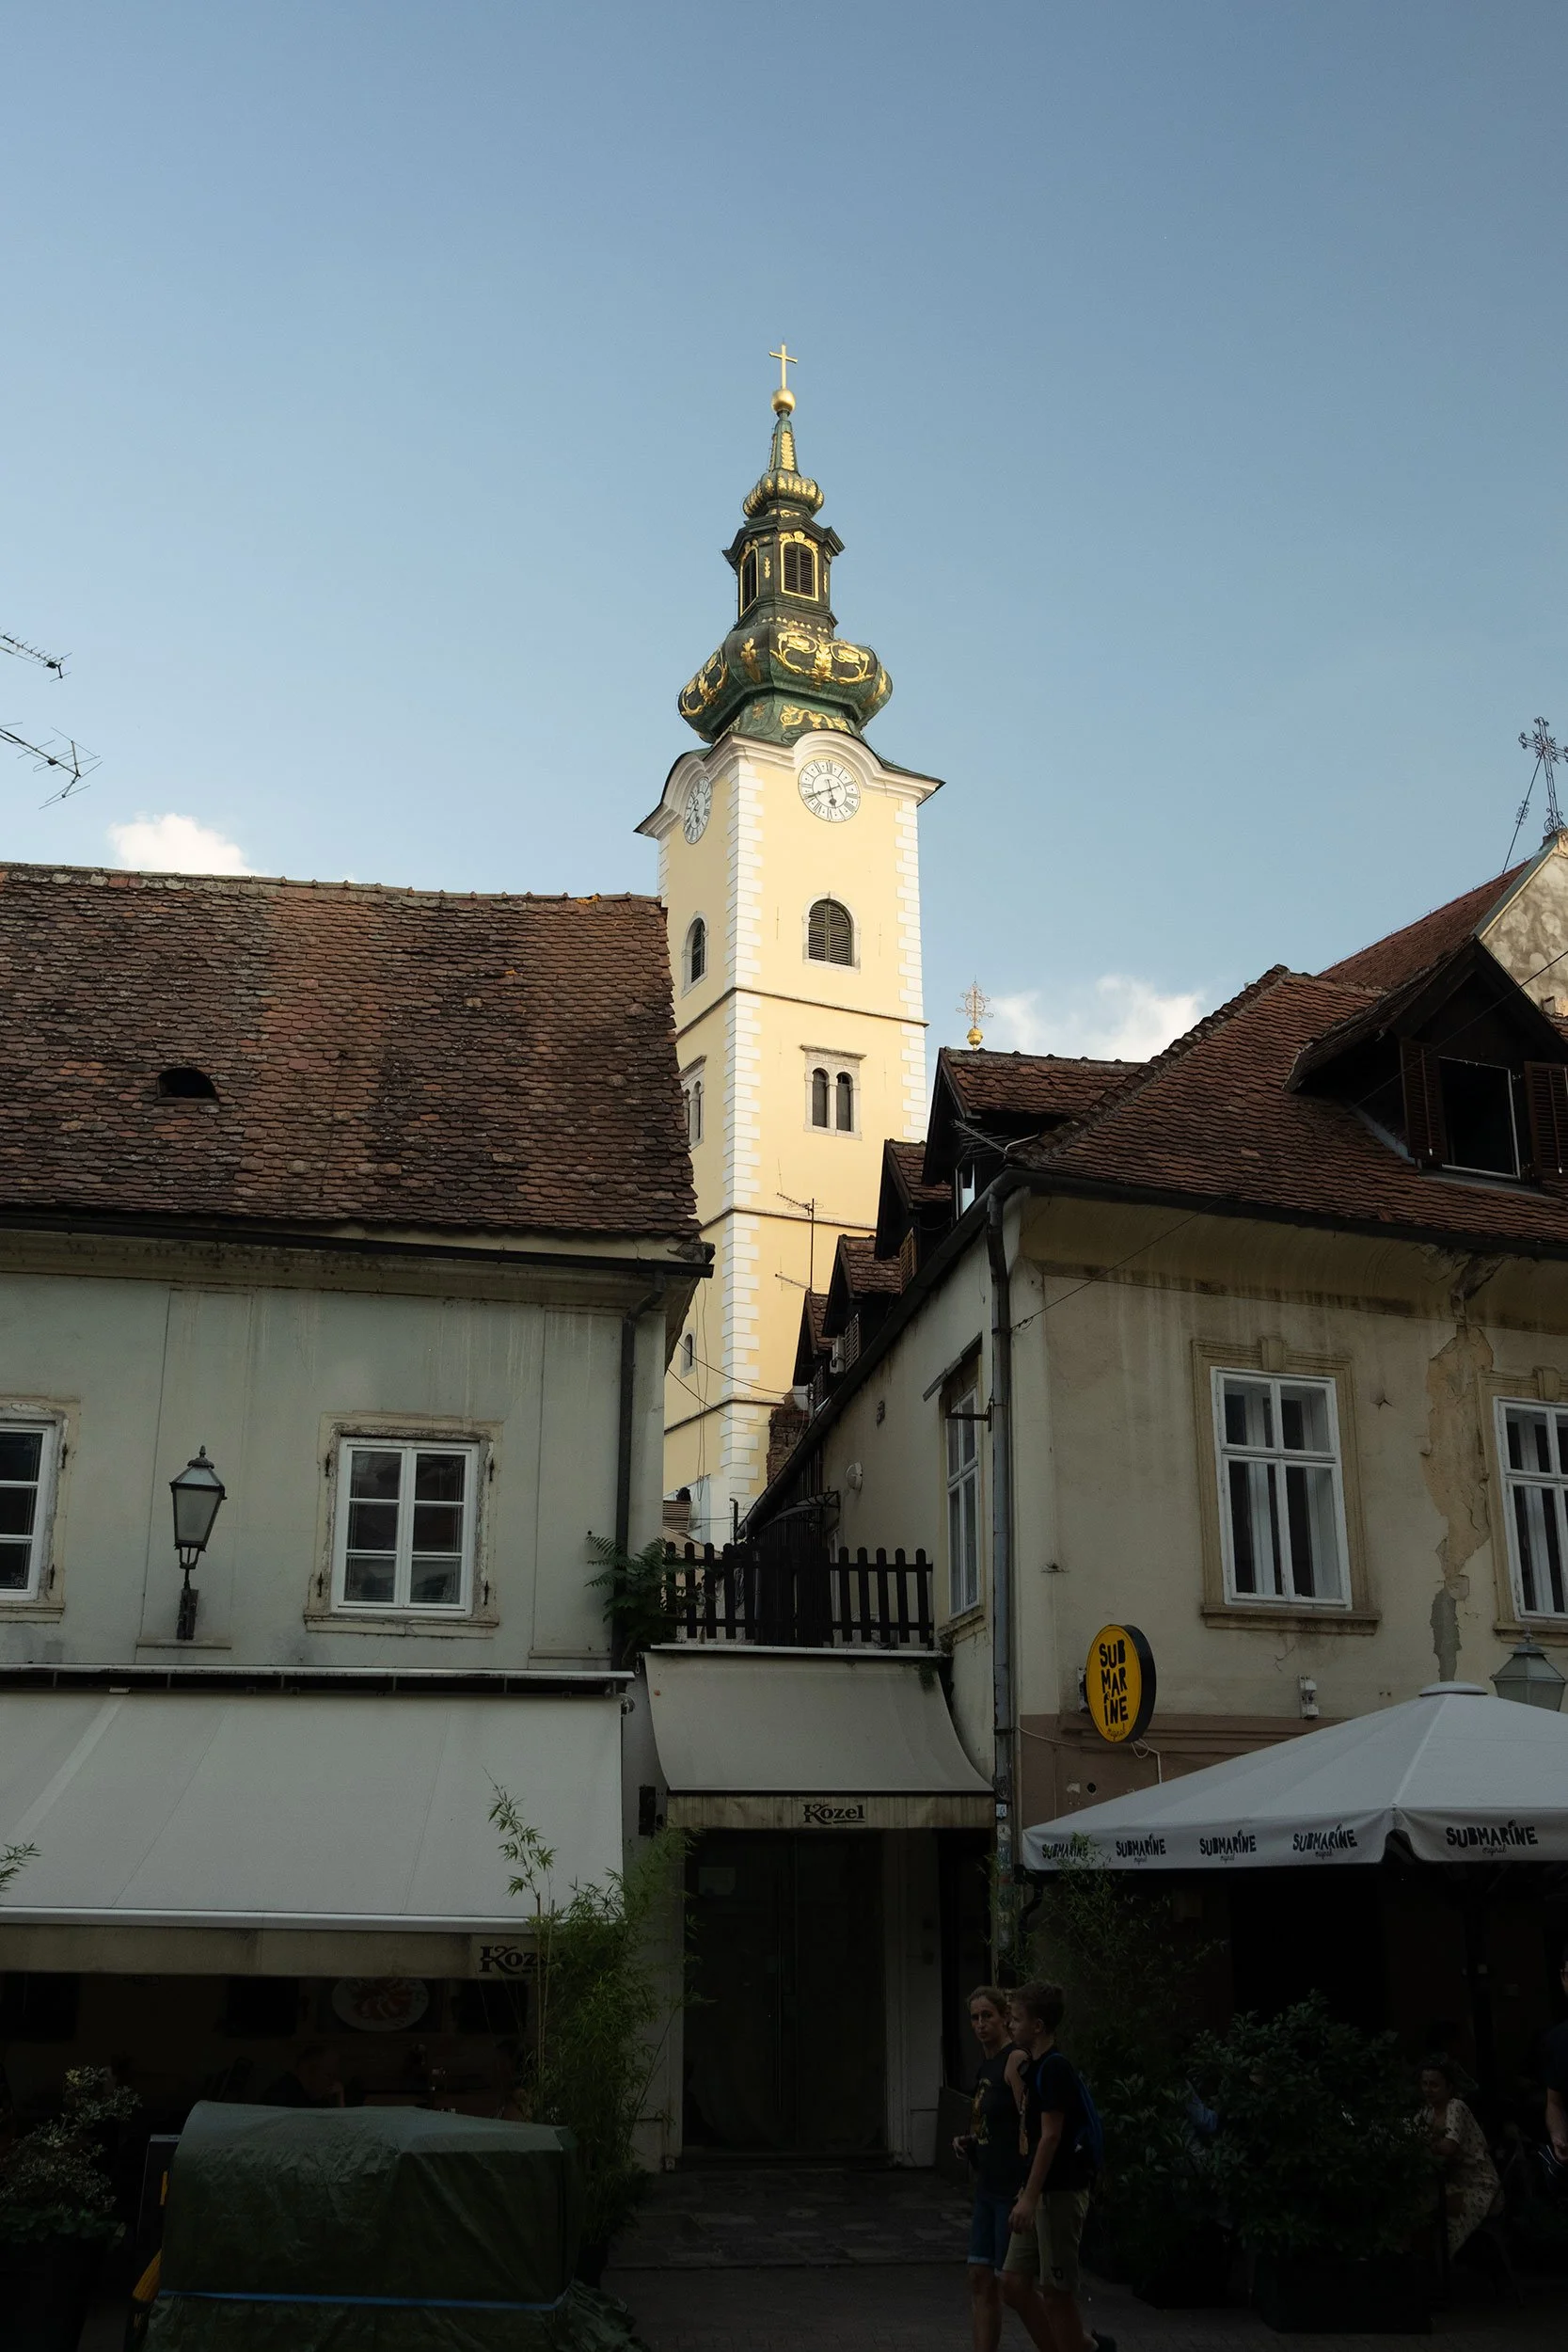
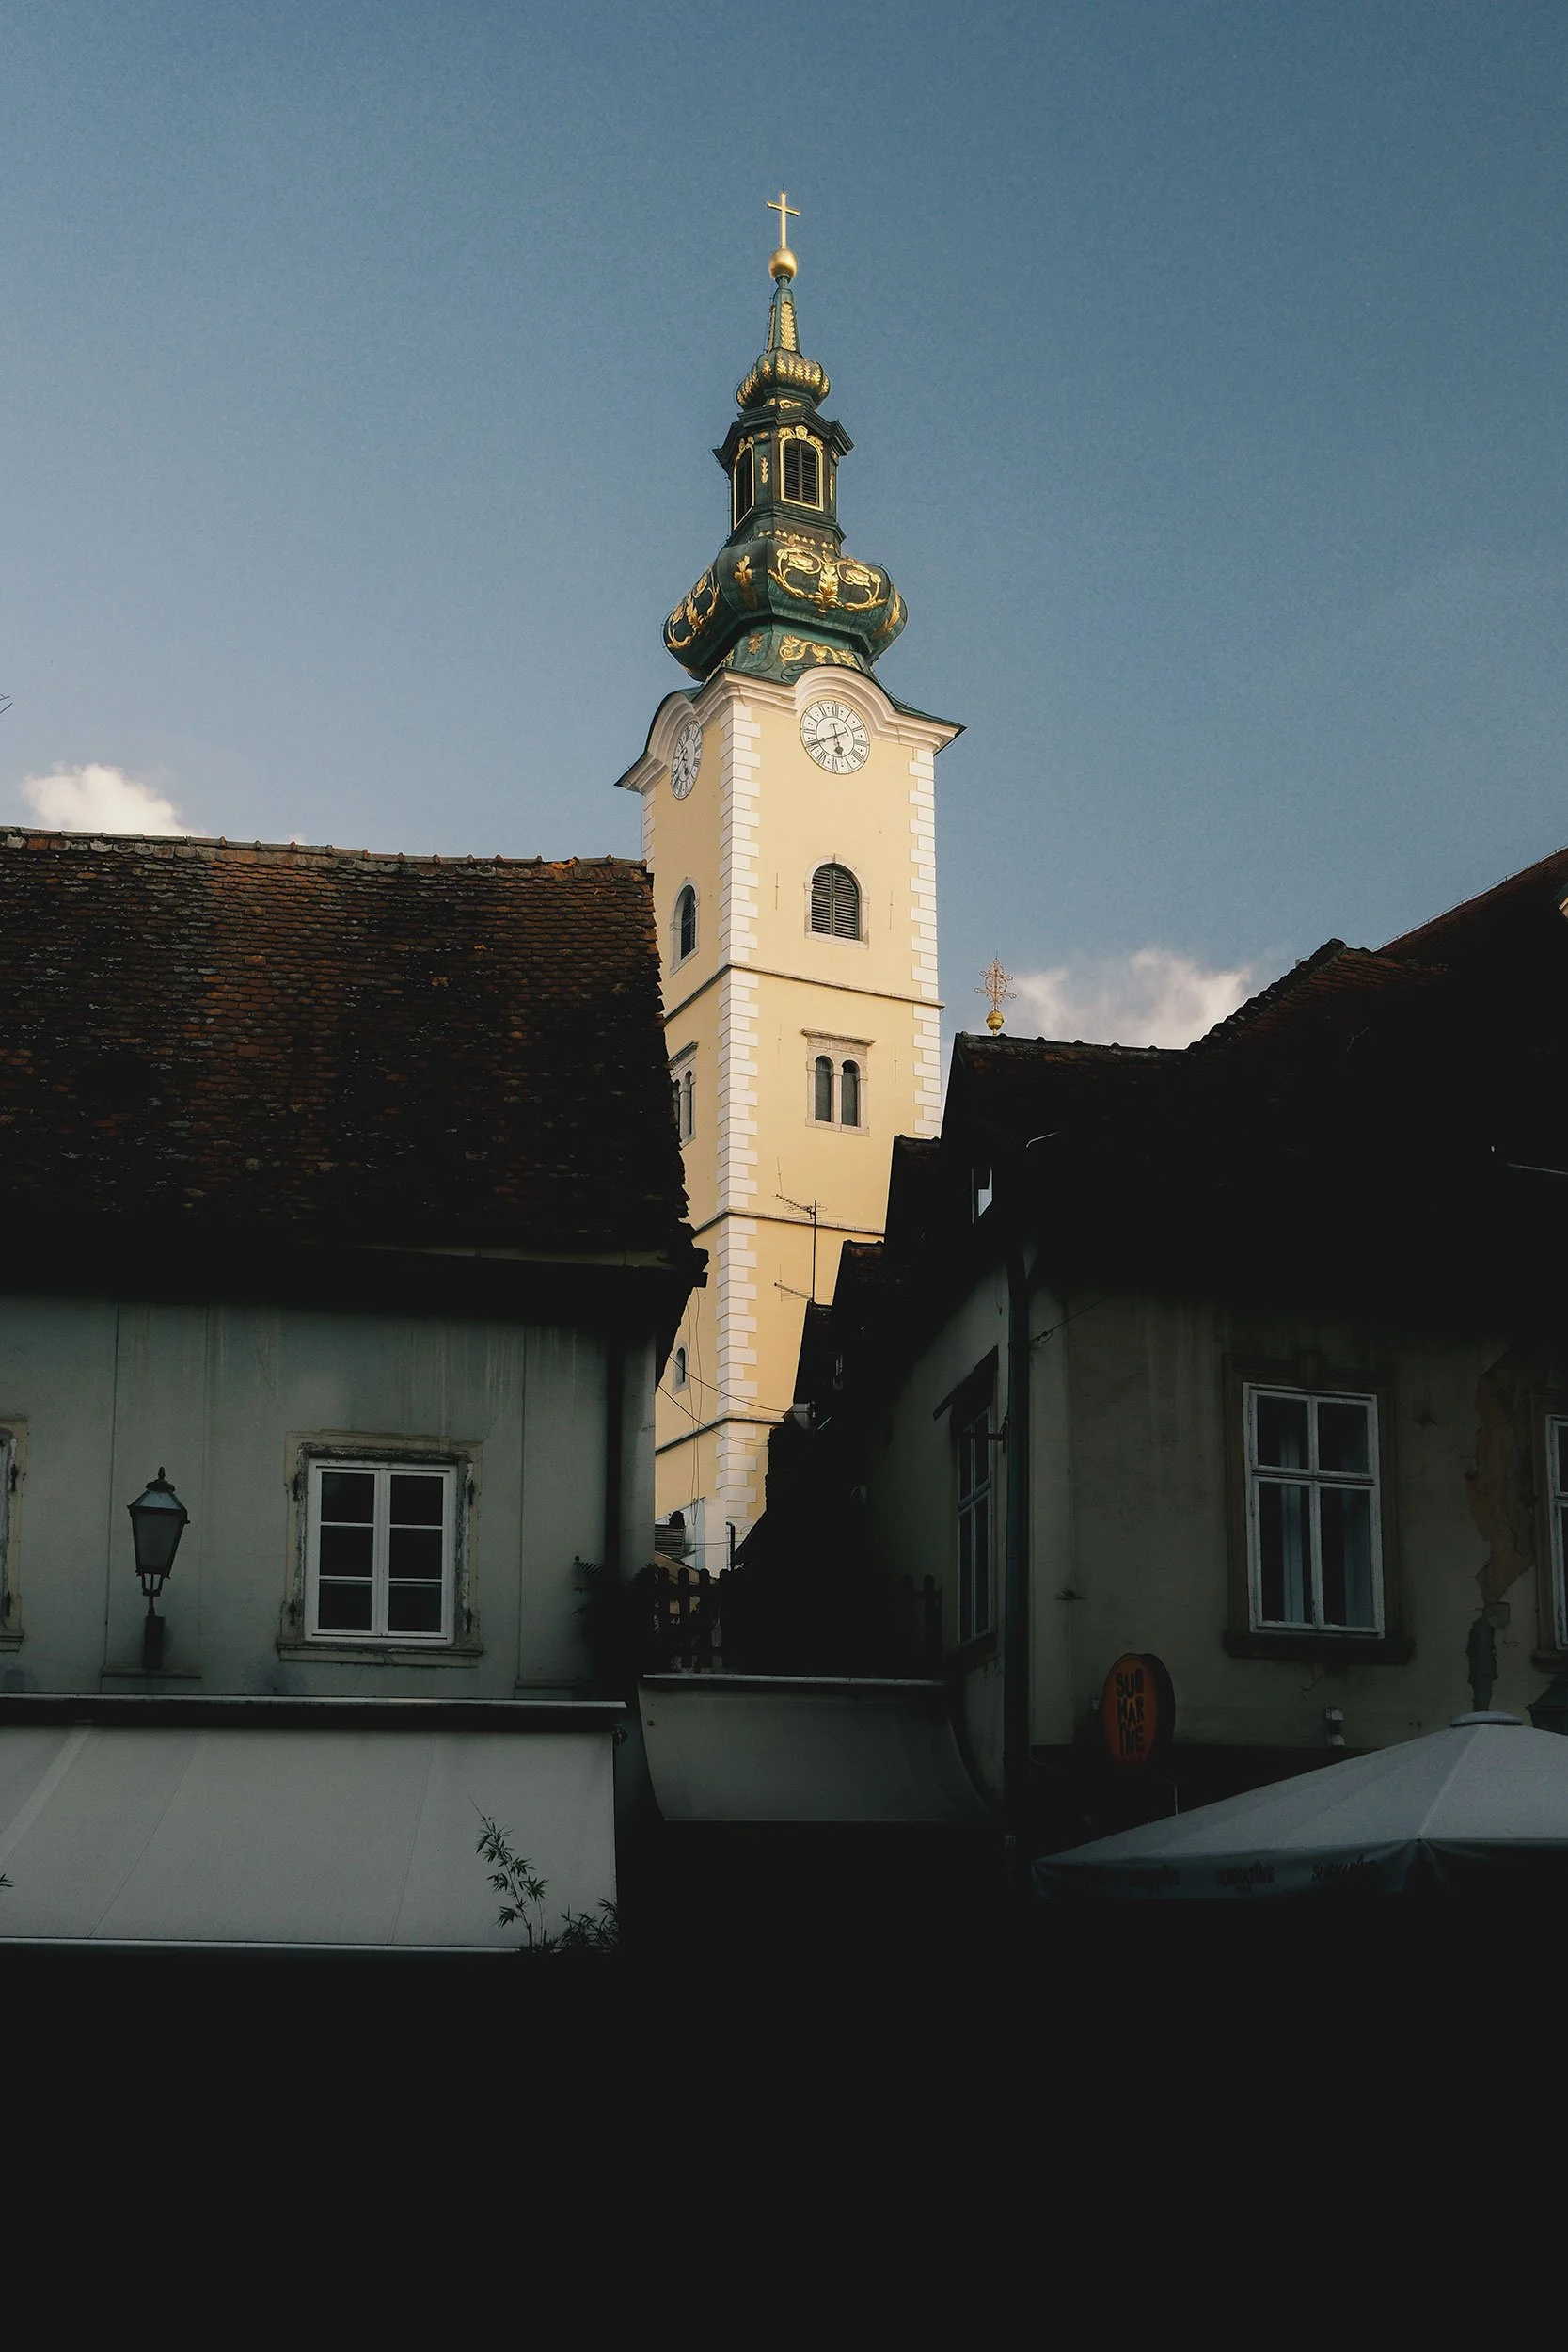
The light here wasn’t bad; in fact, it was quite good. Since the tower is the subject and main focus, I wanted to draw more attention to it without losing its context among the surrounding buildings in the foreground. By concealing people and other small elements in the shadows while keeping the building facades visible, this approach creates a cleaner, more readable frame that naturally draws the eye toward the tower.
And because I reduced the overall highlights in the image, I applied a mask to the tower to restore some of its highlight detail and visual weight so that it would stand out more clearly.
Applying a subtle vertical transformation also helped tighten up the composition. The tower no longer leans away from the frame; instead, it settles into the scene as a stronger, more intentional subject. As a bonus, straightening the image slightly removed the power line just above the roof to the left of the frame, giving the building a bit more breathing room and a cleaner final shot.

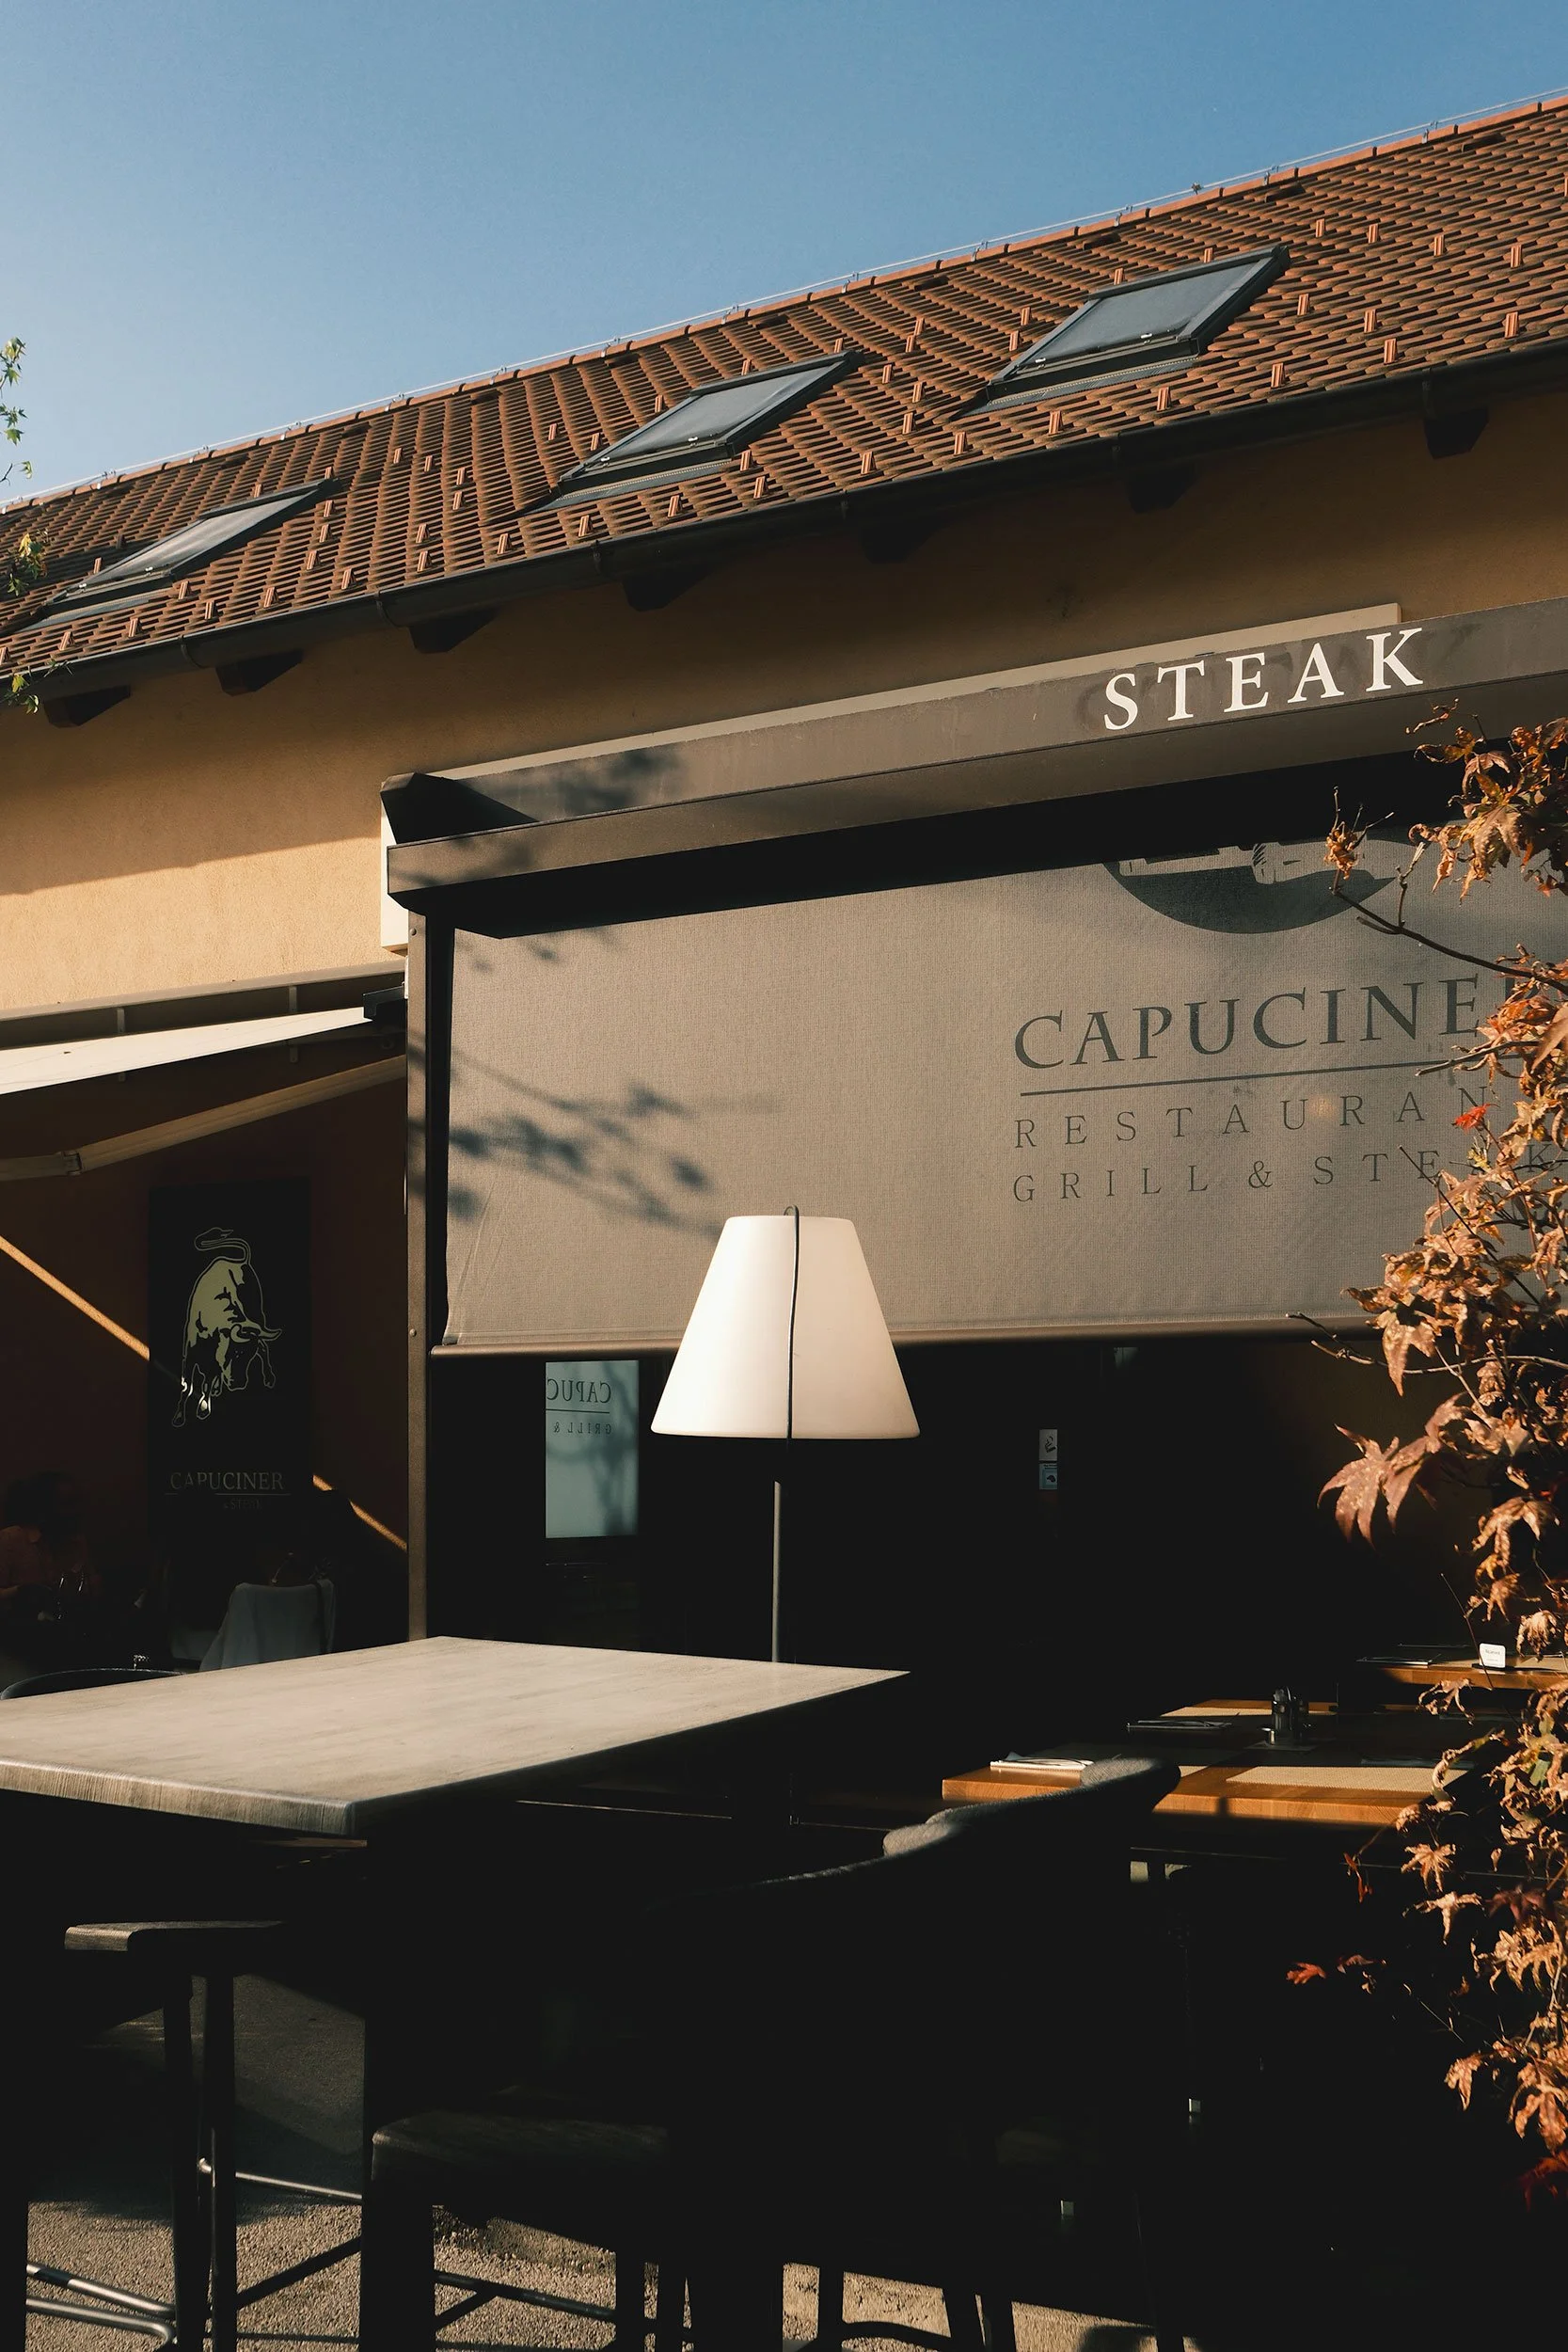
This second image is another example of concealing elements through shadows. For me, the most interesting part of the photo is the contrast between highlights and shadows, so I wanted to emphasize that and minimize everything else. The people dining to the left of the frame immediately grabbed my attention, so I chose to reduce their presence and let the shapes and light become the main focus.
Reduced Shadows -100
Reduced Blacks -41
Reduced Highlights -49
Tone Curve: Lifted the black point: Input 0, Output 22, Reduced the white point: Input 255, Output 249
Transform: Vertical -14
With travel photography, hiding details in the shadows can shape the mood and focus of a scene. Letting parts of an image fade into darkness can add mystery, intimacy, or quiet tension that fits the feeling of a place. Shadows have a way of simplifying the noise, pulling attention toward what really matters. Shadows can also create atmosphere. Even with just a few adjustments, the impact can be dramatic, and a subtle editing choice that invites viewers to imagine what they can’t see can turn a photograph into something that tells a stronger story.
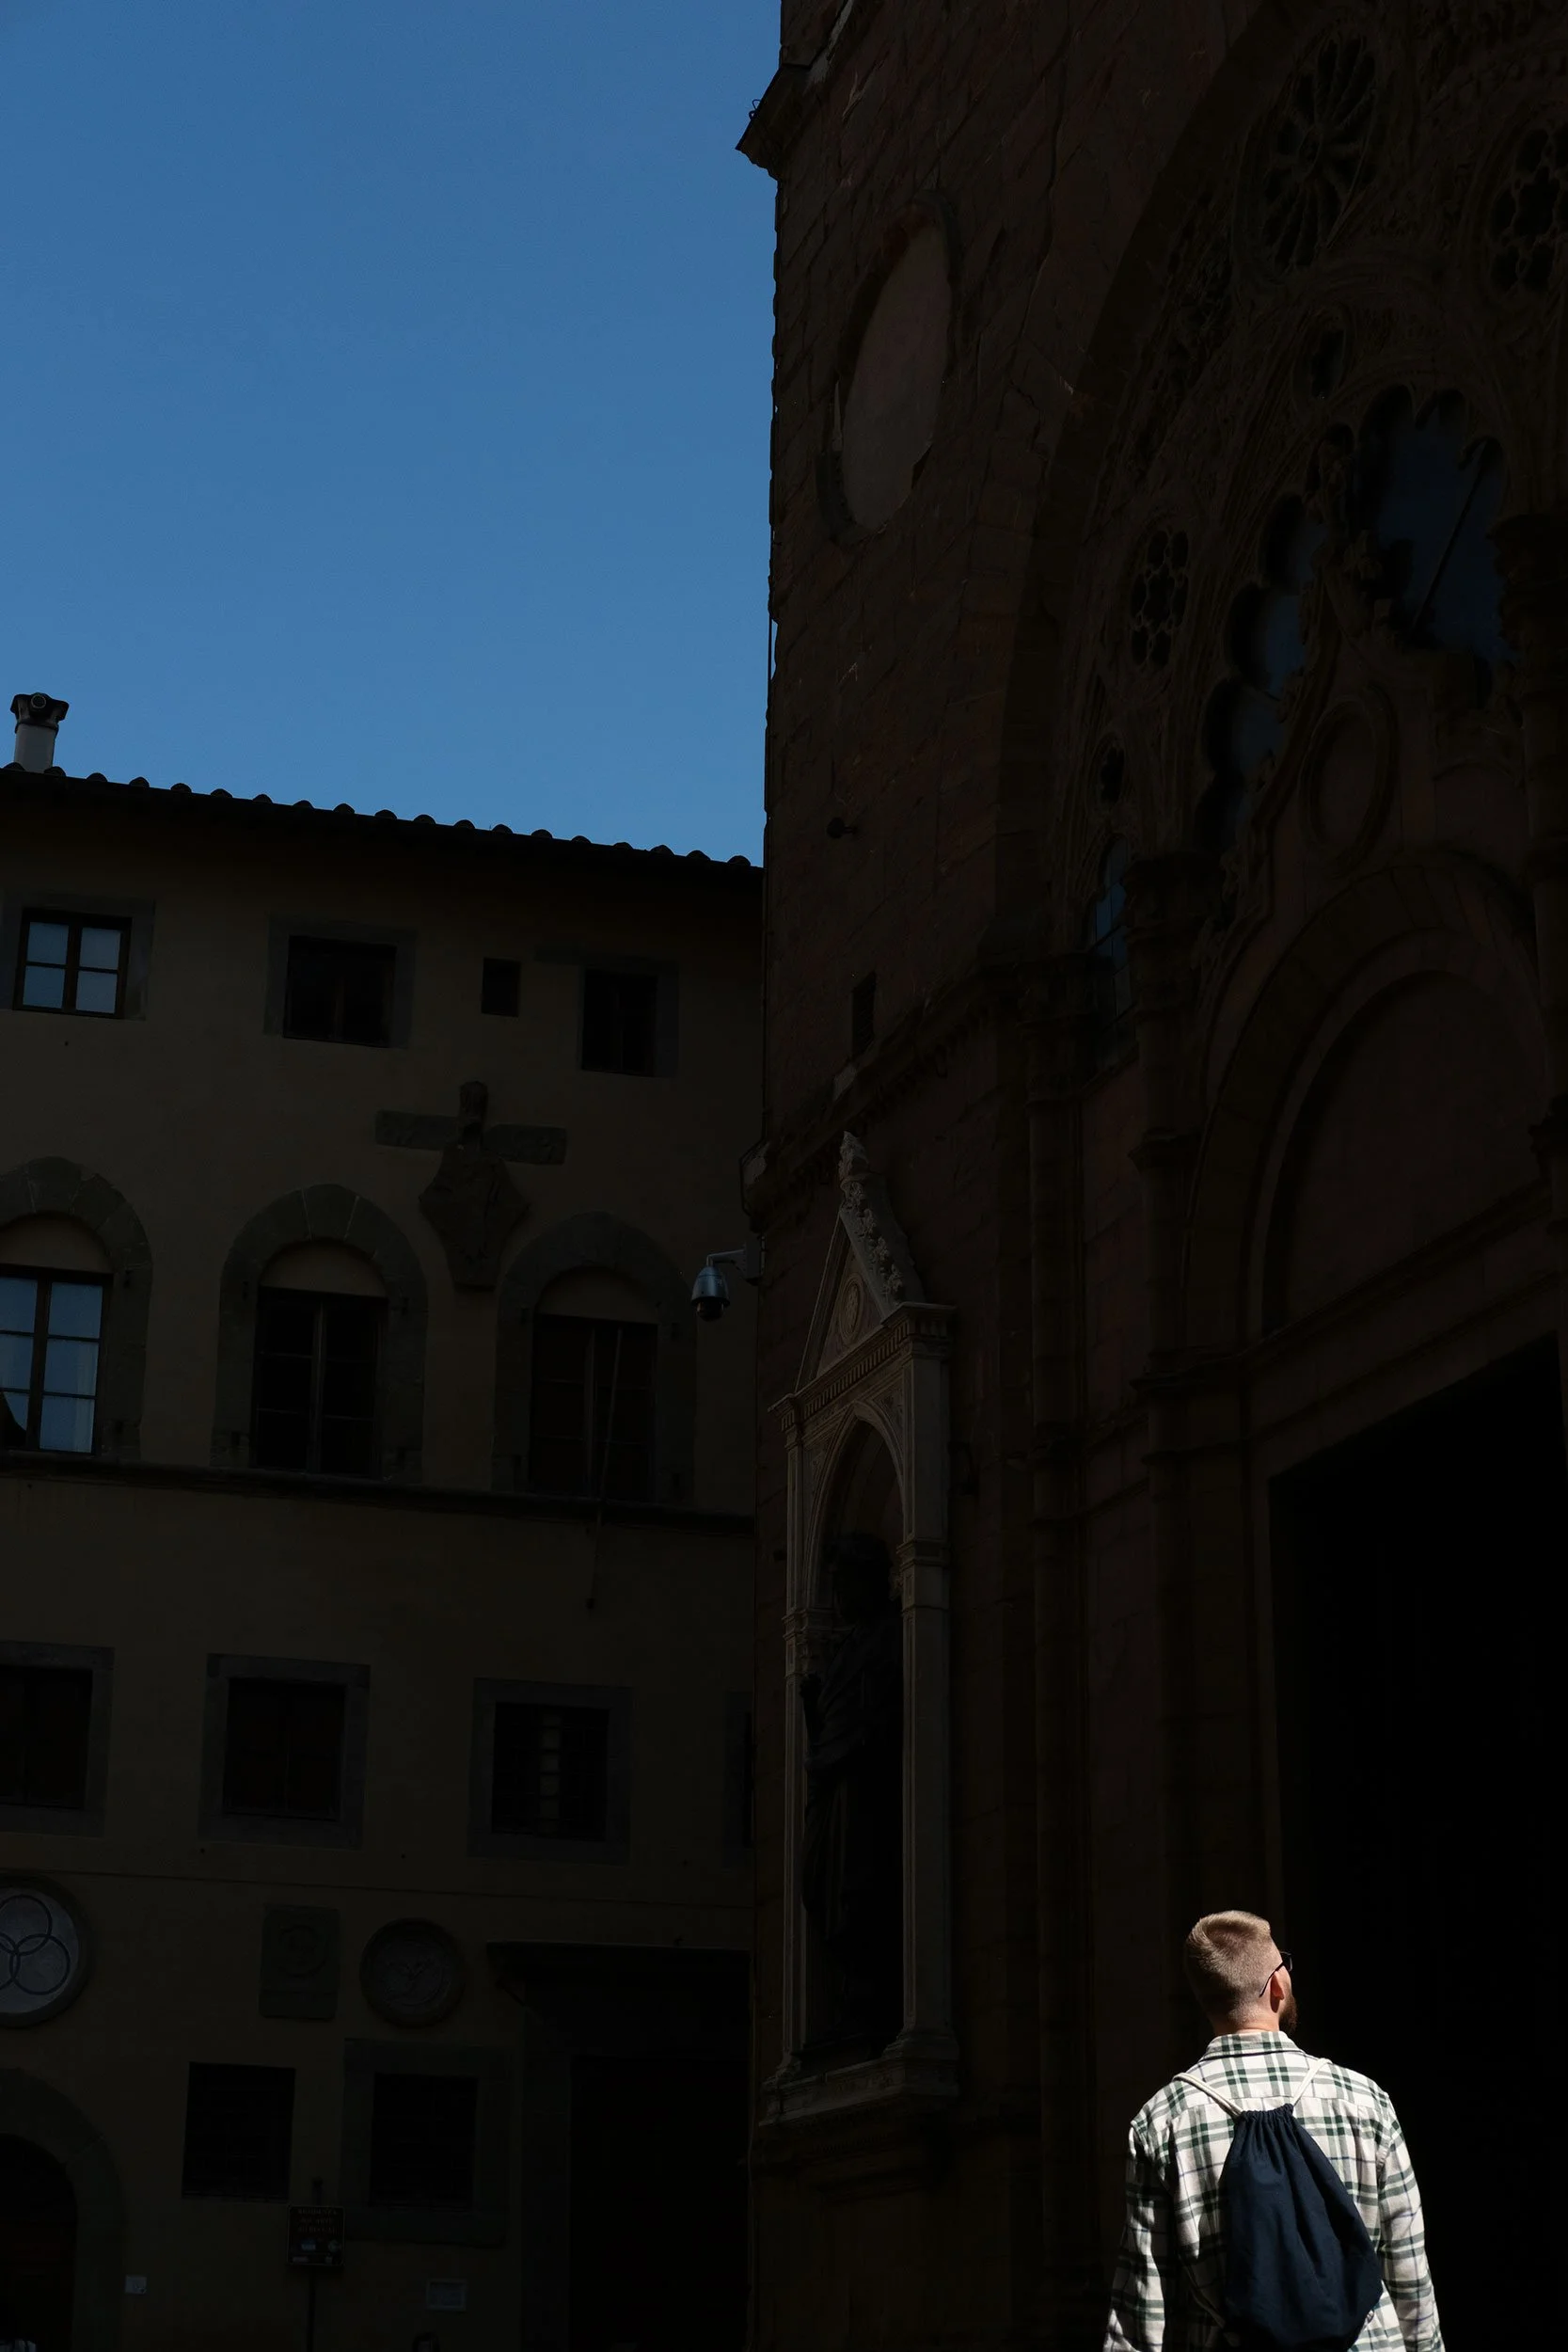
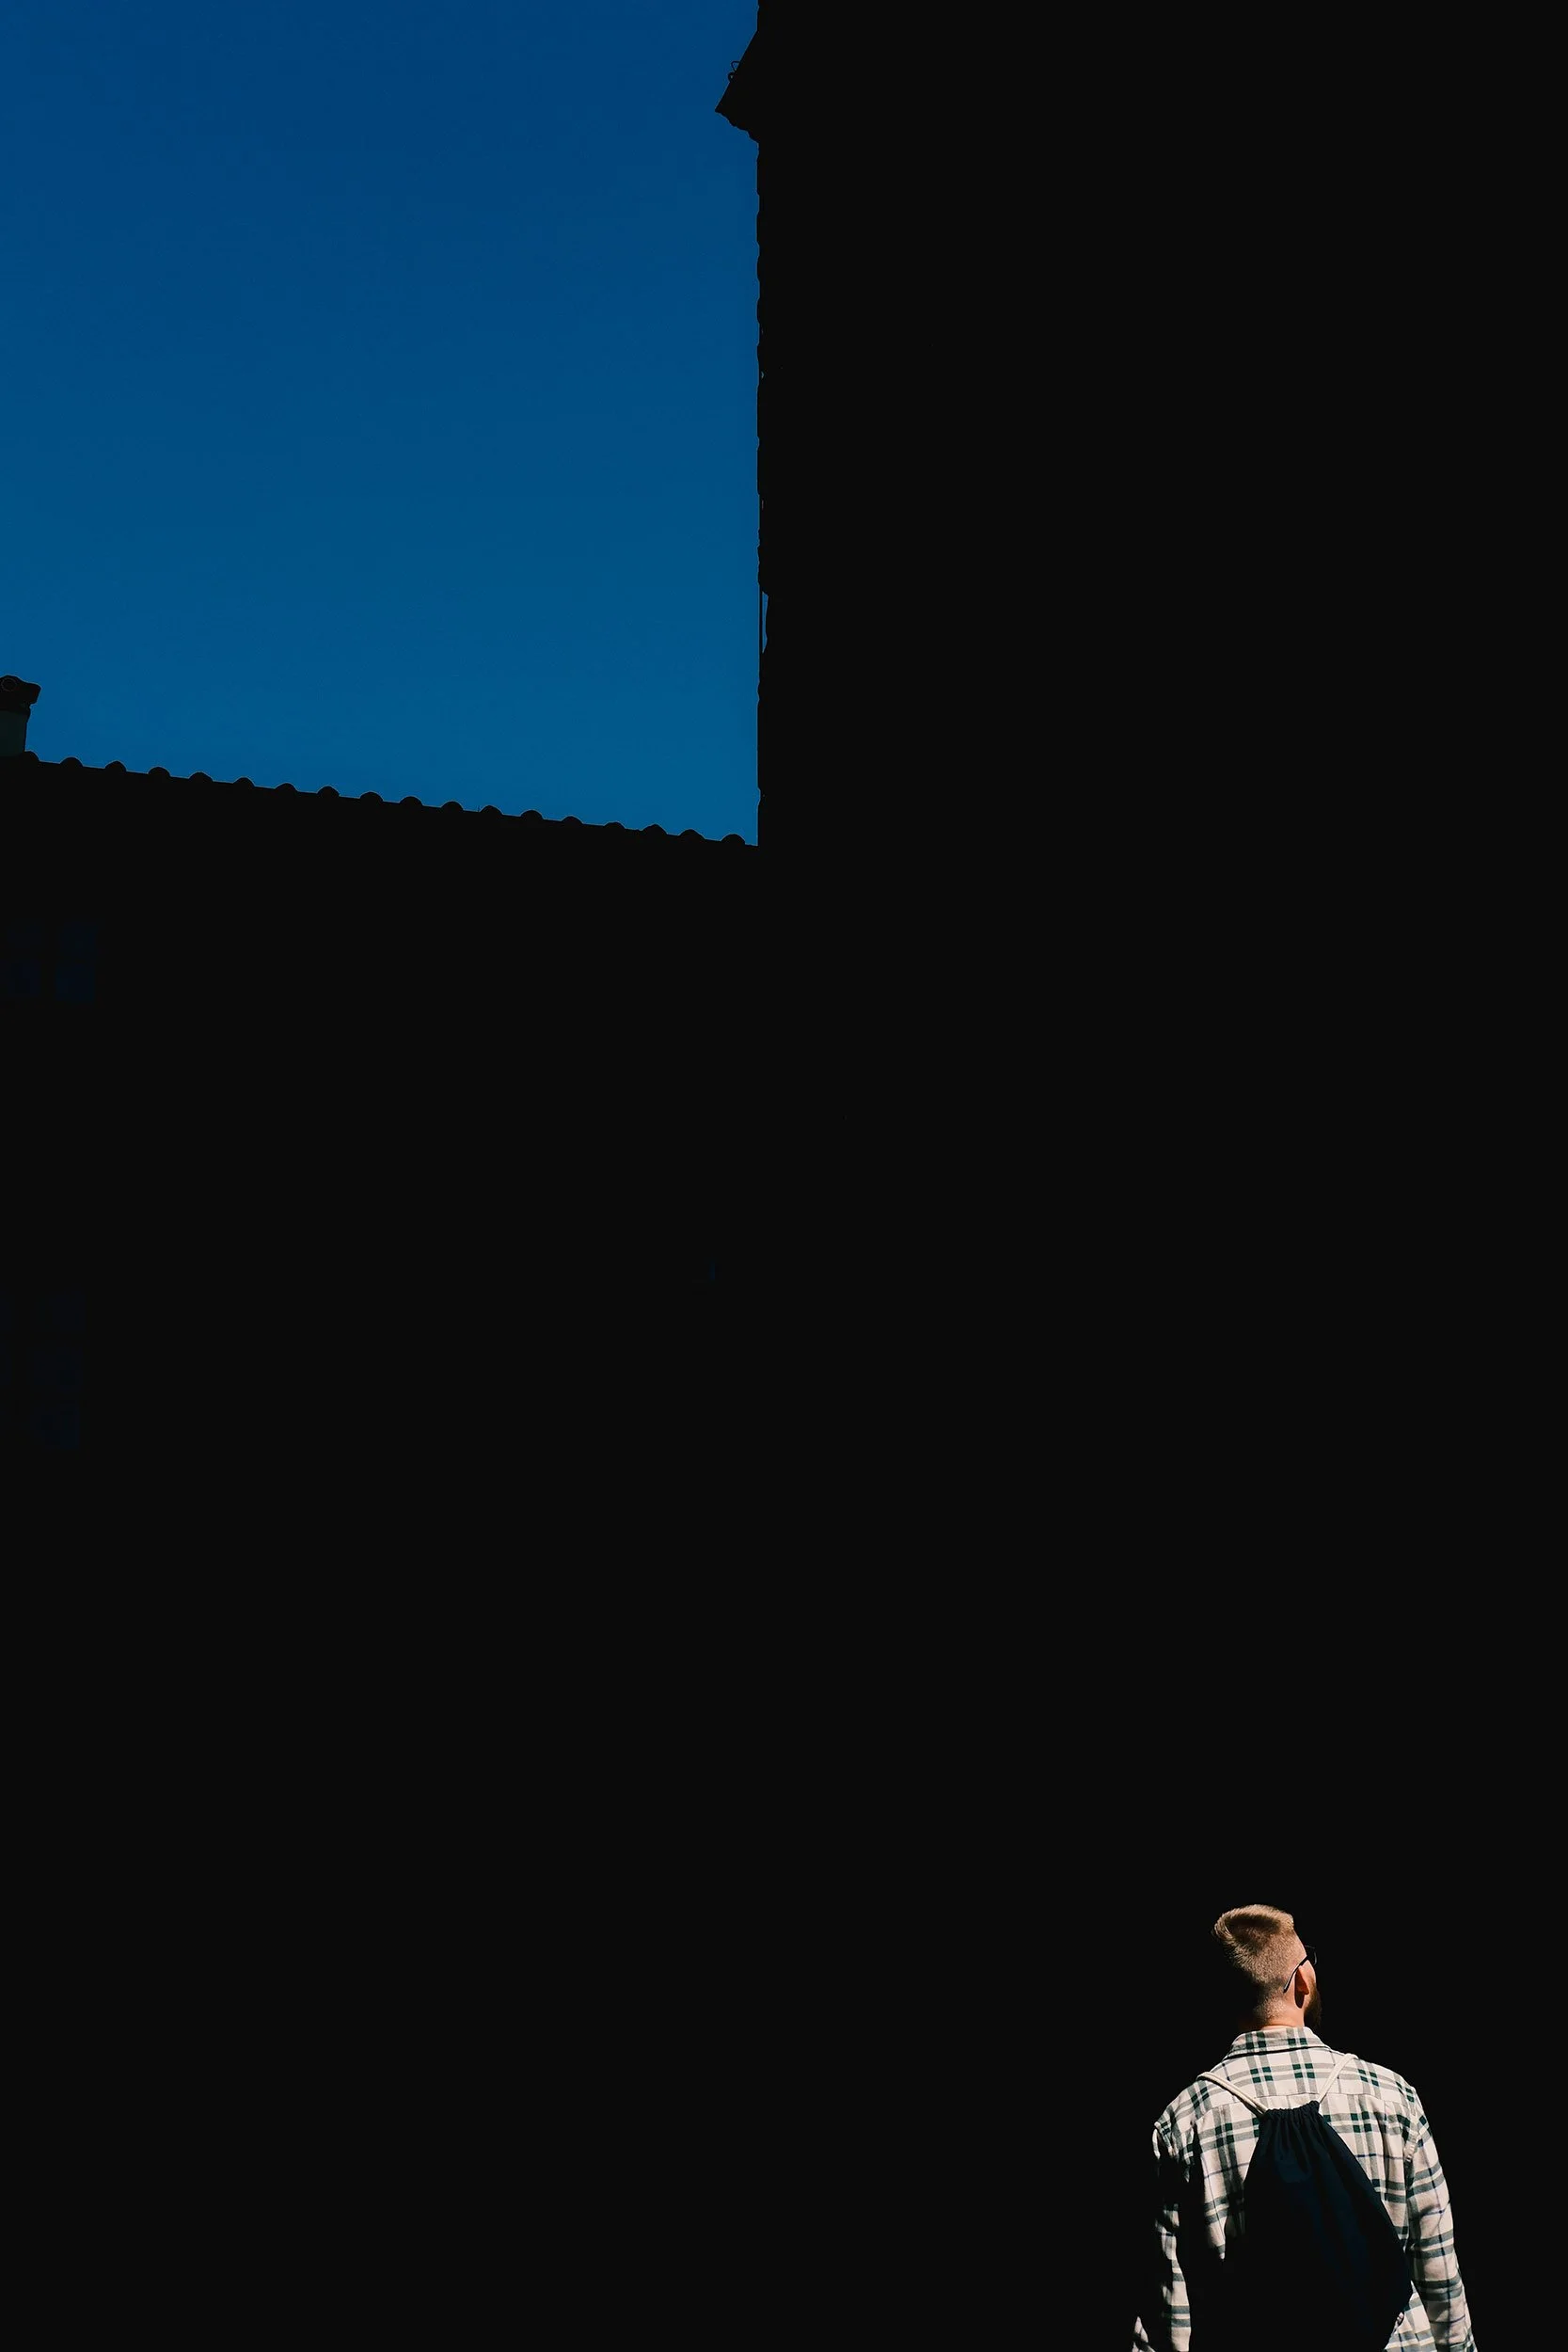
In this next example, the mood completely shifts. In the RAW image on the left, you can clearly see what the man is looking at, which lets you draw your own conclusions about the scene; his attention is clearly focused, and that question is answered. In contrast, the edited version leaves everything uncertain: where he is, what he’s looking toward, and what those surrounding structures might be. By darkening the shadows, those details disappear, creating mystery and directing the viewer’s gaze. The composition now forms an almost subtle arrow in the top left that leads your eyes straight to the person in the bottom right.
Reduced Shadows -100
Reduced Blacks -57
Tone Curve: Lifted the black point: Input 0, Output 9, Reduced the white point: Input 255, Output 249
Crop Tool to straighten
Conclusion
In the end, withholding information can make a photo far more powerful. You invite the viewer to lean in, wonder, and imagine the parts of the story that lie just outside the frame or hidden in the shadows. Sometimes the strongest images are the ones that don’t reveal everything; creative use of concealment can elevate a shot, hide distractions, and build intrigue. Even subtle changes can have a big impact, and knowing what to keep and what to omit is a powerful storytelling tool.