5 Tips for Interior Car Photography
1. Find a Good Location
Focusing on the interior, it would be wrong to think that your location doesn’t matter. If you are concentrating on macros of interior details, this will not be as relevant, but with a wider angle, you are sure to capture the car windows in your photograph, probably the windshield and one of the side windows. Take note of your area and find a background that is mostly free from distractions, as those distractions will take away from the impact of your photo, drawing the eye away from your focus. Look for a clear sky, small hills, a clean tree line, etc. Avoid people, buildings with logos, and unappealing structures. Keep note of what you want the viewer to focus on, check your photos and look to see where your eye goes in the frame. If it goes straight to the exterior, you’ll probably want to move the car or adjust your framing lower to eliminate the background as much as possible.
2. Take Note of the Light
This is tricky, as low light is preferred; it can also give you weird shadows in the interior. If you are taking these photos outside, try to avoid the mid-day sun as it will create harsh shadows that do not look great in your photo. If you can’t avoid the mid-day sun, find a place with optimal shade coverage. Having an open area with low light can allow you to move the car to the angle that gives you the light you desire. Also, low light can give you the option of having the sun peak in the corners of your interior, shooting directly into the light, which can add a lot to the impact of your photograph. You’ll want to shoot into the light and move around so the sun is just peeking into your frame to get that sunburst. The higher the f-stop, the bigger the sunburst, so start around f/8-f/10 and go up. Keep note of your time as well as the light falls. It will significantly impact the light in your photos and happen quickly.
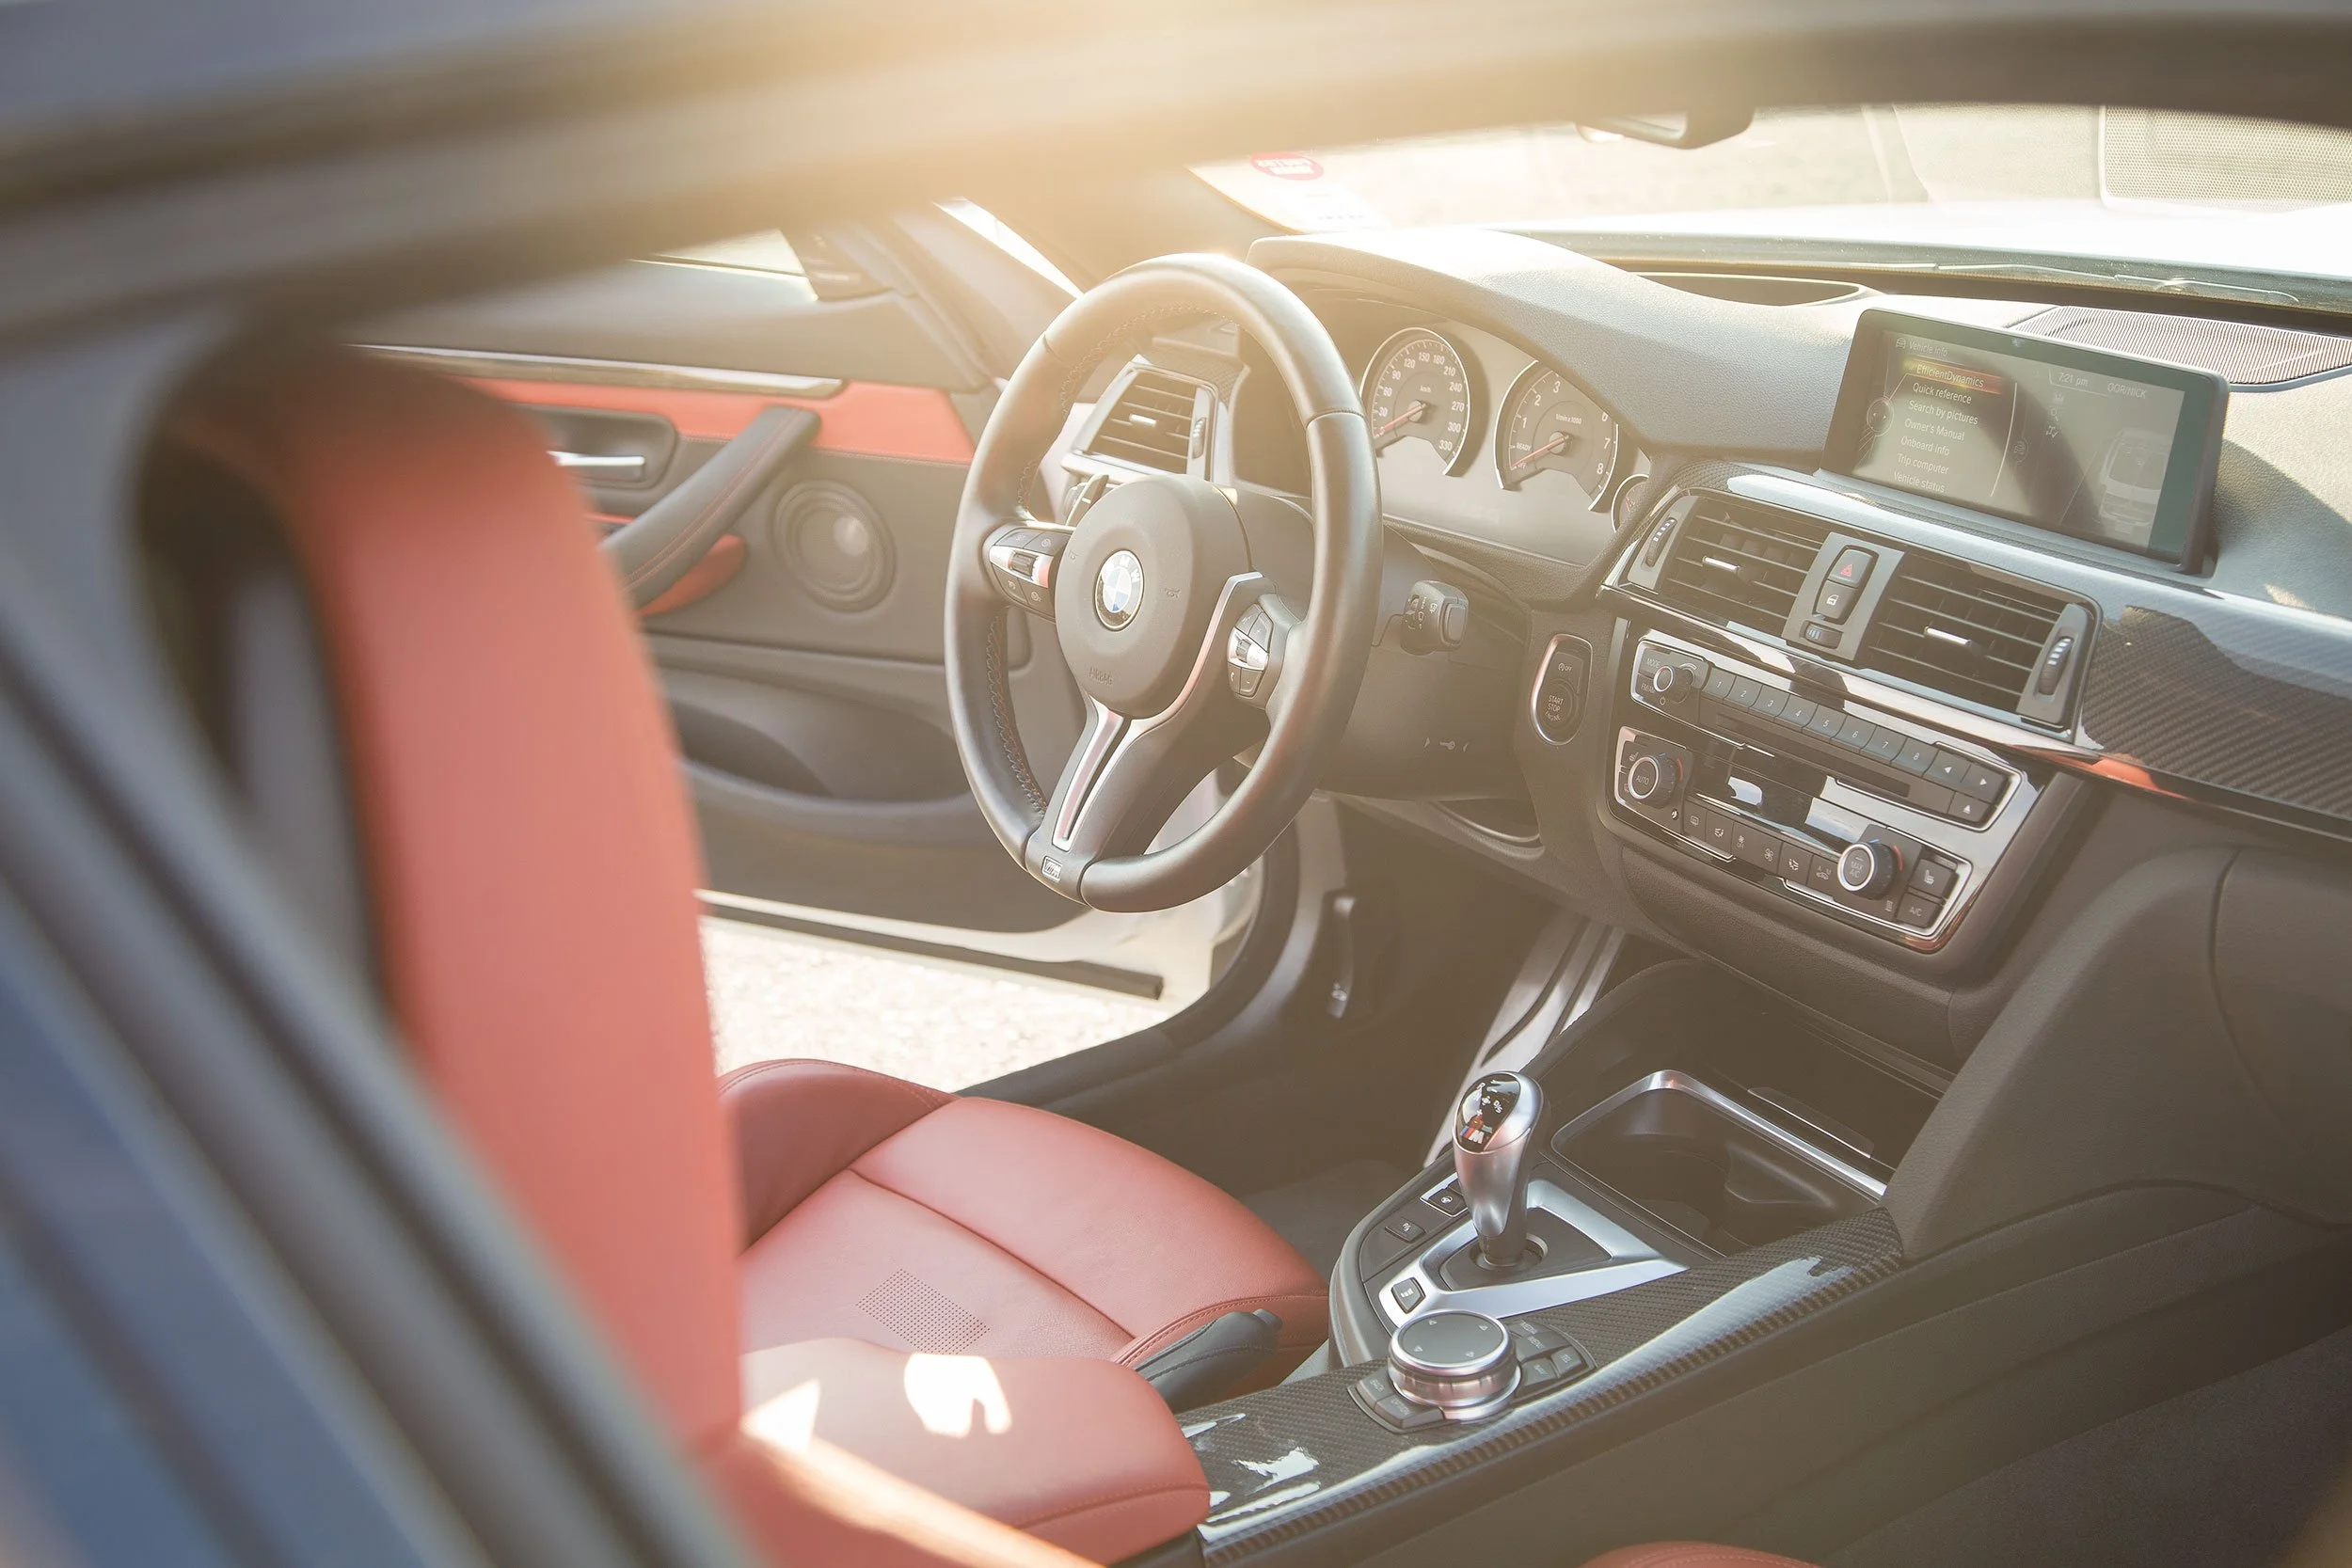
BMW M4
3. Clean Up
Cleaning up as much as possible is incredibly important when taking interior photos. First, shake out the floor mats. Even if you don’t plan to get the footwell area in your photos, you’ll thank yourself if you do capture the floor in one of your photographs because every single piece of dirt, gravel, grass, sand, etc., will all show and it will be a lot of cloning and patching during post-processing. Please do yourself a favour and take the mat out, shake it, and ensure it’s positioned correctly when you put it back. Having the mat off by even an inch can make a messy and unprofessional-looking photo. Secondly, use a micro fibre cloth to wipe down the dash, instrument panel, and gear lever/gearshift area. Remove as much dust as possible, as this will save you a ton of time as you will have much less to remove during post-processing. Manual transmissions tend to get the most dirt and dust buildup around the shifter area.
4. Make Sure Everything Else is Neat
I recommend making sure all dials and air vents are lined up correctly. That means making sure your dials are in the same position. For example, if there is a physical toggle or dial, be sure to have them consistently positioned either in the middle (if possible) or all to the left or right. Also, it is essential to set the air vents in the middle and ensure they are preferably facing straight vertically and horizontally. This step can be easily overlooked, but it’s one of the most important as it will make a world of difference to the professionalism in the presentation of your photo. If possible, look at some press photos of the car you are photographing to see how they have them positioned. Just google “year, brand, model, press photos.”
5. Watch Your Angles
Depending on what aspects of the interior you want to capture, you can go from small details with a macro lens to wide angles, capturing everything from one door to the next. When using a macro, focus on an f-stop as low as possible to eliminate background elements with a nice bokeh. Macro lenses are exact with focus when using a low f-stop. You’ll want to check your photos immediately after taking them to ensure your focus is where you intended, and if not, reframe or increase your f-stop to get what you want. Getting too much in your frame (including you) is very easy on the wide end. Keep note of reflections on the doors, as you will probably be just outside the car when taking these photos, to ensure you don’t capture yourself in the frame. Also, take note of the angle of your shot to avoid distortion of the interior elements. I prefer a 24-105 lens, as anything below 24mm seems too wide for my liking.
Conclusion
To conclude, shooting interiors requires a lot of preparation, as overlooking small things can significantly impact your photo. Be sure to bring a micro fibre cloth to wipe down the interior quickly. Also, this post assumes you are using a tripod. Macro shots will mostly be handheld, but anything else should have your camera secured to a tripod. This will allow you to use a high f-stop and avoid any potential blur or missed focus.
Genesis GV60